- Load the litlflwr.jpg image using the Load Image item in the File
menu.
- Using the lower portion of the toolbar (which we call the "chapter
bar")...
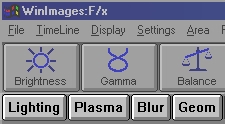
Chapter bar (highlighted)
...select the Lighting button. The top portion of the
toolbar (the "verse bar")...
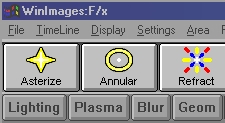
Verse Bar (highlighted)
...moves to show you the lighting operations. Right-click on the Asterize operation...
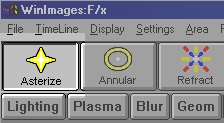
Asterize Operation Button (clicked)
...you have now selected the operation to perform and opened its settings dialog. You can adjust any setting here, so we'll adjust a few right now. Change Arms to 7, the Width to 20, and click the Center Glow option to on (it is checked when it is on)...
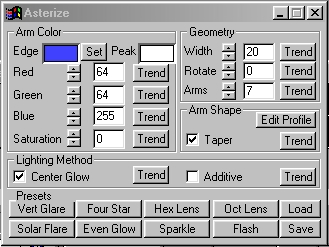
Asterize Settings Dialog
- Left-click on the Ellipse area selection...
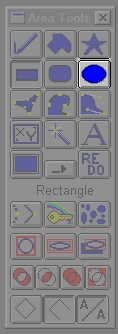
Ellipse Tool (highlighted) in Area Toolbox
...in the area selection toolbox.
- Now simply place the mouse pointer in the middle of the flower, press the left button and pull out while keeping the left button depressed...
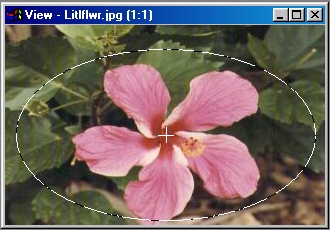
Your area selection should look like this
...release the button when you have a good sized ellipse...

Your results should look like this!
...and you should have something similar to what you see here.
That's really all there is to basic still-image use of the effects in WinImages F/x. Pick your operation, adjust the settings, pick an area selection, pull out the area on the image and then let go. Simple!
- As mentioned above, a file is loaded using the Load Image... option in the File menu. Using the file dialog, locate the sub-directory called Images that was installed with the program, and double-click to open it. In this directory is a file called litlflwr.jpg. The file is loaded by simply double clicking on the file name.
|
Note:

|
The Images directory is the default installation directory for all WinImages F/x images. If you have selected to place these images in a directory other than the Images directory, the litlflwr.jpg file should be found in the directory you specified during installation. If not, retrieve it from the CDROM. It is in the CDROM's Images sub-directory. |
|
- Now that the file is loaded we will create the animation. Select the Standard operations group by clicking on it in the chapter bar. The entire Standard operations group will move to the far left of the icon bar. Now, select the Contrast function from the verse bar. Its icon is the third from the left, and looks like this:

Contrast Operation Button
You will also notice that the name of the function appears in the Status Bar's Op display area. The Contrast operation can also be accessed by selecting the Operations pull down menu. This menu will provide you with a list of all of the operation groups in the program. The Contrast function is found in the Standard Adjustments group, and is selected by clicking on it.
- The Contrast operation allows you to adjust the light and dark regions of an image. We are going to create an animation that goes from a contrast adjustment of -100% to 100% of the original pixel values in the region. This can be accomplished through WinImages F/x's powerful Time Line. The Time Line allows you to create animated effects by dragging and dropping the desired operation into the time line. The Time Line can be opened by clicking on its icon or by selecting the Show Time Line option from the Time Line pull down menu.
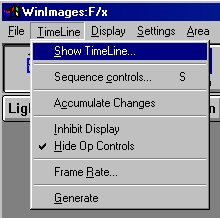
Timeline Menu |

Timeline button in toolbar |
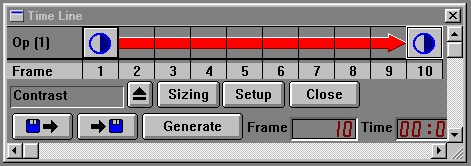
Once the Time Line has opened, you should see the contrast operation's icon in the first level of the time line dialog. If you do not see it there, you can use "drag and drop" to copy the contrast icon from the tool bar and place it in frame 1 of the first level (at the top left.)
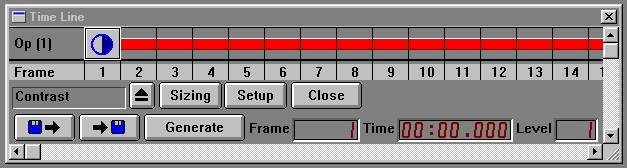
Timeline as first opened with contrast selected first
You should also see an arrow that stretches to the end of the time line. This arrow specifies the duration of the operation, and any interpolation. Interpolation is the modification of a variable from one setting to another over time. In this case it will be the interpolation of the contrast operation from -100 to 100. Since we want to interpolate from -100 to 100, we will need to set these values. This can be done by specifying the value in the operation dialog before placing it in the time line, or by "grabbing" the values from the dialog after the operation has been placed in the time line. Since we already have the first contrast operation in the time line, we will use the second method of setting operation values. Set the slider for the Contrast amount to -100 %, and then double click on the contrast icon in the time line. This will access the time line operations dialog.
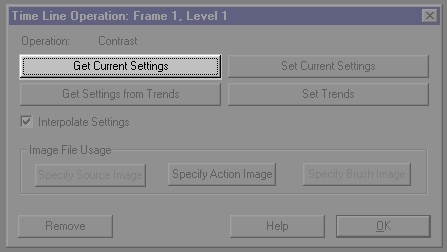
Timeline Operations Dialog
This dialog can be used to specify or obtain the parameters for an operation, or to specify action and source images. For this example we will want to select the Get Current Settings option. This will take all of the current settings for this operation directly from the dialog. So, in this case it will "grab" -100 as the contrast value for this key frame.
Next we want to specify the contrast value of 100 as a key frame. Let's use another method of placing values in a key frame. Scroll the time line to the right using the scroll bar at the bottom of the time line. Scroll until frame 10 is visible.
|
Note:
|
If your time line is opened to a large enough size, frame 10 may already be visible.) |
|
Now, set the contrast dialog to 100.
|
Note:
|
On low resolution displays the time line may actually cover a dialog. In some cases it will be necessary to move the time line to "find" the contrast dialog. |
|
Once you have set the contrast setting to 100, use "drag and drop" to copy the contrast icon from the tool bar and place it in frame 10. After you have completed this, the time line should look like the following:
Timeline after adding second Contrast Operation
- At this point we have specified an animation that goes from -100 to 100% contrast. The next step in creating an animation is to specify an area selection. This area selection will tell WinImages F/x where to apply the specified operation. For this example we will specify an ellipse which will interpolate into the entire image. Begin by grabbing the ellipse icon from the tool box, and then place it in frame 1 of the time line above the contrast icon for that frame. At this point the time line should look like this:
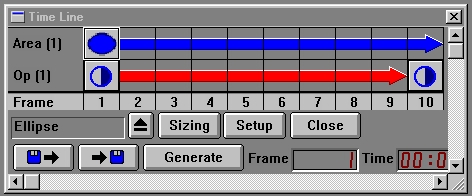
Timeline after adding elliptical area selection
Now, we will set the area selection that we want to have the ellipse interpolate or change into (entire). This is done by dragging an dropping the Entire image area selection icon from the toolbox...

Entire Image Area Selection Tool
...into frame 10. The time line should now look like this:
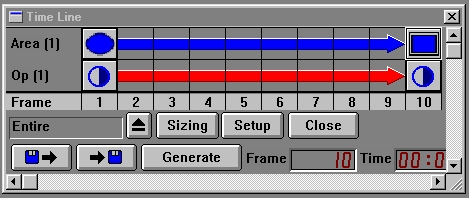
Timeline after adding second area selection (Entire Image)
The final step is to specify the initial elliptical area. This is done by double clicking on the ellipse icon in the time line. This will open the time line's area selection dialog.
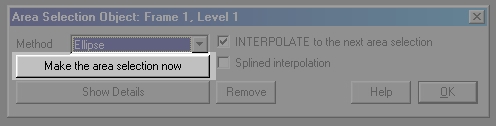
Timeline Area Selection Dialog
One of the options is to Make the area selection now. Pressing this button will bring the litlflwr.jpg image to the front. You can now specify the ellipse by clicking and holding the left mouse button near the center of the image. You can now move the mouse to size the ellipse. Pressing the right mouse button in conjunction with the left allows you to change the position of the ellipse. Releasing the left mouse button at any time will select the area, and will place it into the time line. If the area selection is not the correct size or is not in the proper position, re-select the Make the area selection now option, and make a new area selection. You will want to make the area selection about the size of the inner portion of the flower near the center of the image. This completes all of the setup for creating the animation.
- You are now ready to generate the animation. This is done by pressing the Generate button on the time line dialog. The sequence will be generated based on the area selection and operation parameters that we specified. The generation time of an animation can vary from system to system. This time is also dependent on the type of operation or operations selected and the number of frames in the animation. The tutorial animation takes about 2 minutes on a very old 486 - 25MHz with 16 Megs of RAM (this will take less time if you turn on the Inhibit Display option in the Time Line menu.
The animation can be played once it has finished generating. The animation is played by pressing the Play button...

Play Button in Filmstrip
...on the filmstrip. The Speed control...

Speed Control in Filmstrip
...allows you to adjust the rate of playback for the animation. The animation can be stopped at any time by pressing the Stop button...

Stop Button in Filmstrip
The final results should look like this:
Play Example Animation
These basic steps can be followed to create an animation using any of the operations and area selection tools. You also have the option of applying the operations to only a single image. This is done by simply setting the controls for an operation, selecting an area selection method, and then applying the area selection to the desired image. Remember this was only a simplified example of how to use some of the tools available in WinImages F/x. Further review of this manual will be necessary to fully utilize all of the power of the program.
See Also: