Page 22
The Basics
The Getting started tutorial will introduce you to the basics of using WinImages F/x.
This tutorial is not intended to be a comprehensive overview of the program,
or a substitute for reading the other sections of the manual. Its main purpose is
to give you a feel for how easy the program is to use, and how powerful it is. Throughout the
tutorial there are references to topics that are covered in greater detail
elsewhere in the manual.
WinImages F/x is easy to use, but it is much more powerful than most users realize - to get the greatest benefit from the software, you must take some time with the documentation!
Setting the Environment for your first use of WinImages F/x
- If you have not already done so, start WinImages F/x by clicking on its icon, or use the File Manager's Run command with the FX.EXE file selected.
Once the program is running, you may wish to open (or bring its window back to the front) the WinImages F/x help file to this section, and resize both the program and help file to fit on the same screen. This way you can perform the operations and view the tutorial at the same time. In some cases you may need to use the Alt+Tab key combination to flip between WinImages F/x and its Help
document.
- The next step is to take a few moments to customize WinImages F/x to your system. Remember, these are things that will generally only have to be done once. Click on the Display menu option in the Pull Down Menu bar at the top of the program window. This menu contains options for altering the display mode of the program to best fit your system. Select the Info on Display option...
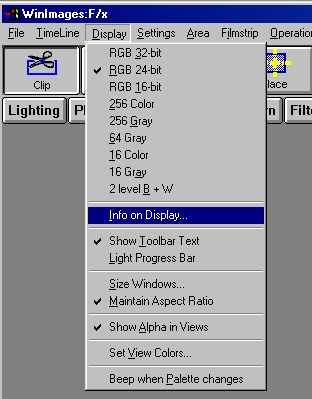
Display Menu
...this will display the current settings of WinImages F/x, and will also tell you the display mode that the program suggests for your system.
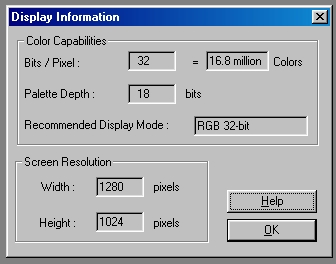
Information On Display Dialog
Once you have reviewed the information in this dialog, click OK.
|
Note:

|
WinImages F/x will automatically start in the display mode shown in this dialog unless you change it manually. If you do need to alter the display mode, simply click on the appropriate mode in the Display menu. If at any time you wish to alter the background color of the program window, this is changed by selecting the Display menu, and then altering the Dark Background control. The background will be black when this control is selected, and gray when it is not selected. |
|
- Now, we'll set the length of the animation and the filmstrip. The animation/filmstrip length is set using the Sequence Controls option in the Time
Line menu.
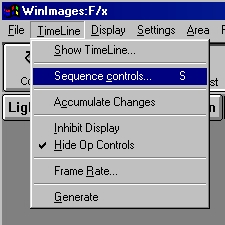
Timeline Menu
The Sequence Controls dialog allows you to set the length of the animation/filmstrip as well as other items we'll get to later. Set the Total Frames control to 10 by entering the number in the provided text entry field. This sets the length of the animation (and the filmstrip) to 10 frames. For this tutorial we will want to turn the Save Result control off...
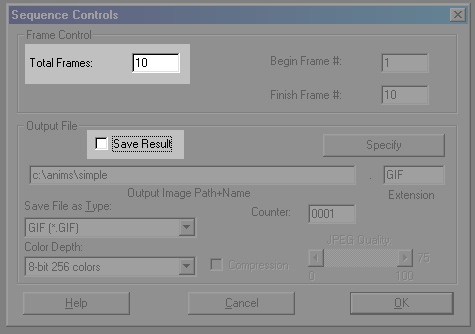
Sequence Controls Dialog
...after setting the animation/filmstrip length and turning the Save Results control off, press OK.
You will also want to make sure that the filmstrip is currently visible. The filmstrip is turned on by using the Show Filmstrip control in the Filmstrip pull down menu, or by clicking on the Filmstrip icon located towards the right end of the tool bar.
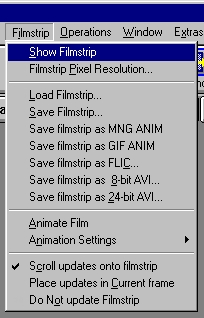
Filmstrip Menu |

Filmstrip button in toolbar |
|
Note:
|
You must have the filmstrip on if you wish to view animations inside WinImages F/x. This tutorial requires the filmstrip to
be on. |
|
How WinImages F/x handles Image Views
View Sizing
WinImages F/x has a very powerful image viewing system. In order to get the most from WinImages F/x, it is critical that you learn how to use these views effectively. This is true even you're familiar with graphics packages in general; WinImages F/x works differently from other applications!
To begin, load any image using Load Image and it's MRU (Most Recently Used) subdirectories in the File menu. The image then appears in a view window. If the image is of a size that will fit in the working area, the image will be shown at a 1:1 display size. If it is larger than the working area, WinImages F/x may reduce the view size so that the entire image is visible. You can work on the image in this form, thoughy care shold be exercised due to the fact that area selections aren't as precise as they could be. This is because not all image pixels are visible and selections no longer overlay the image on a pixel for pixel basis.
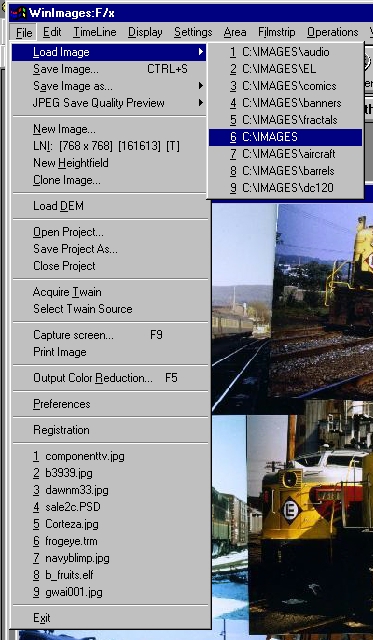
Load an Image |
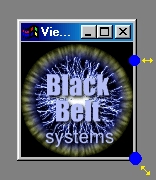
Example View Resizing Locations |
You can resize the image view at any time by simply grabbing any edge or corner of the view with the mouse and dragging. When you resize the view, WinImages F/x will always rescale the image display (this does not change the image resolution). This means that when you resize a view, you are changing the magnification of the image by an arbitrary amount equal to the change in view size.
You can also resize the view in a number of ways using the menu that is available at the upper left hand corner of the view, or by using the keys shown in parenthesis in the menu while a view is the active window.
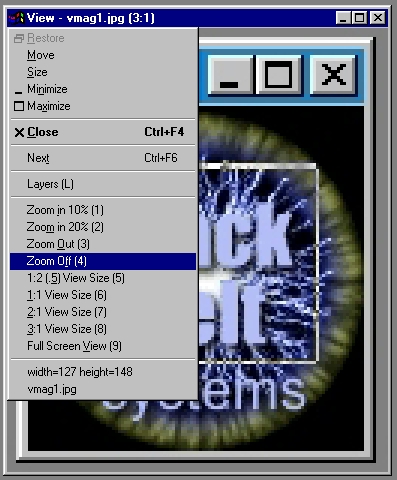
Image View Menu
You should take a moment to try both resizing by the edges and the view menu before
continuing.
Magnification of specific regions

Using the magnify tool (available at the upper right of the main WinImages F/x window), you can click on a view to enlarge (left side of the tool) or reduce (right side of the tool).
You can also drag out a rectangle and WinImages F/x will resize the view to contain the area you selected, a very powerful and useful way to look closely at image information. When you have a magnified view of a portion of an image, you can resize that view arbitrarily also, as shown in the samples below:
Dragging out an area to magnify |
Image View that results |
This is what you get if you enlarge the already magnified view
Tip: |
 When you drag out a magnify rectangle, one corner of the rectangle "anchors" where you first click and the opposite corner follows the movement of the mouse as long as you hold the left button down. This is already more flexible than applications that simply take a click to give you a 2x magnification (although F/x will do that as well - just click, and there it
is).
When you drag out a magnify rectangle, one corner of the rectangle "anchors" where you first click and the opposite corner follows the movement of the mouse as long as you hold the left button down. This is already more flexible than applications that simply take a click to give you a 2x magnification (although F/x will do that as well - just click, and there it
is).
However, there is an additional degree of flexibility available to you:
 As long as you continue to keep the left mouse button down, you can press the right mouse button and the rectangle will be released from the initial anchor point, allowing you to re-position the entire rectangle. You can release the right button and continue to size, and then right button again at any point. This is a very powerful means to get just the right region under magnification.
L mouse adjusts size |
L+R mouse moves entire rectangle |
|
|
Area Selections as they relate to view size
No matter what size an image view is, you can use any area selection tool on the visible contents and the results will be predictable and reasonable. This allows you to "get in close" and do fine work, or work in a more global fashion, whatever suits your needs of the moment. This is called resolution independence and is a concept that appears throughout this application.
Another example of resolution independence is the area selections themselves. When you create an ellipse on one image, WinImages F/x remembers the details of the ellipse as a relative position in the view, and a size relative to the view. This allows you to click the redo tool, and click on an image that is a completely different resolution, and the area selection will be in the same relative size and position.
One immediate benefit of this is you can make a reduced resolution version of an image, try out some effects which will generate more quickly on the lower resolution image, and when you get the effect you want, just click redo in the area toolbox and then click on the full-size image. The effect will appear in the same relative position and size, using proportionally more pixels and generating with more detail.
WinImages F/x's resolution independence means that in many ways, it works differently than other applications you may be familiar with. However, there are many benefits to this display technology that make learning some new working methods well worth anyone's time. We're sure that once you're familiar with WinImages F/x's view handling, other software will feel considerably less flexible.
|
Tip: |
As described in the above tip for magnification, area selections can also be re-positioned using the same techniques.
For instance, when you drag out an ellipse, it is anchored by your first left click, and sized by subsequent left-button dragging. If, while dragging, you also click and hold the right button, you can re-anchor the ellipse elsewhere, release the right button, and go on sizing. This works with all area selections except "entire image". It even works with freehand selections!
drag anchored selection |
Release anchor and reposition |
|
|
Basic Tutorial continues on next page...
Page 22
WinImages F/x, WinImages Morph and all associated documentation
Copyright © 1992-2007 Black Belt Systems
ALL RIGHTS RESERVED Under the Pan-American Conventions
| WinImages F/x Manual Version 7, Revision 5, Level B |
HTML Documentation Management System © 1992-2007 Black Belt Systems