Page 41

The Settings Menu
Change Working Method
WinImages F/x uses two separate working methods for working with images. The current working method is indicated in the status bar as either [D] or [I]. You can change working methods using either the Settings / Change Working Method item, or by pressing the D and I keys when an image view is active.
The first method ([I]) is similar to the way a paint program works. The area selection is made, and then the current operation is carried out in that area when you release the left mouse button. This is the Immediate Painting method. This method is designed to be most effective when working with the Timeline.
The second method ([D]) is similar to the way that some image processing applications (Photoshop ®, Photostyler, etc.) operate. In this working mode the area selection is created, and then an effect is selected for application by left clicking upon the operation icon. This is the Draw First method.
The Draw First Method allows you to make an area selection, alter it to your specifications, and then apply an operation to the area. This working method is similar to the way that many image processing programs work. An area selection is created in exactly the same way, but the current operation is not applied until the operation icon is clicked on with the left mouse button. This allows you to alter and refine an area selection until it meets your specific needs.
The area selection will appear as a dashed marquee outline of the selected region. You can then apply the default (or last) operation settings to the region by left clicking on the operation icon. The operation settings can be changed by right clicking on the operation icon, and then altering the operation parameters. After you have made the desired changes, you can apply the effect to the currently selected area by left clicking on the operation icon. This method is ideal for selecting very specific selections of the image, and then altering them to best suit your needs. WinImages F/x also allows you to add and subtract regions from the area selection through the use of keystrokes. Holding down the SHIFT key while making an area selection, will add that area to the previous area selection. Holding down the CTRL key while making an area will subtract the new area selection from the previous area.
The working method that you select will be determined by the type of work you intend to do with WinImages F/x, and your previous experience with this and other image processing packages. Each method has its particular merits with certain types of tasks. You may also find that you will switch between the two methods as different tasks are simplified by one working method or the other.
The Working Method defaults to the Immediate Painting Method.
|
Note:

|
These same keystrokes can be used for the Immediate Painting method, but you will be applying the current operation in the previous area selection as well as the new area. |
|
Affect Alpha in View
The Affect Alpha in View control allows you to apply effects to the alpha channel and the alpha channel's RGB image independently. If you would like to apply an effect to the alpha channel in a transparent area (a completely Black area), you must turn the Mask with Alpha control off, except with the color fill operation when Opaque Fills is checked in the Area Menu. The same is true if you would like to alter the RGB image without using the current alpha channel. All operations applied to the alpha will be used as part of the alpha channel, and applied to the RGB image if the Mask with Alpha control is selected.
Affect RGB Only
This control will cause all operations to affect only the RGB image, and not the alpha channel. This means that the area selection could be made in the image's alpha channel view, and it will only alter the RGB image based on the current alpha channel and transparency settings.
Affect Alpha Only
This control will force all of the operations, regardless of image view type, to be carried out in the alpha channel. This means that alpha channel can be altered using either the RGB image view or the alpha channel view. It is important to remember that you must turn the Mask with Alpha control off if you want to apply an effect to an opaque region of the alpha, excepting the color fill operation which can use the Opaque Fill mode to create filled shapes in a totally transparent region.
See Also: Mask with Alpha
Number of Undo Levels
This control allows you to specify the number of undo levels that are to be kept by the program. You can have up to 32,000 separate levels of undo. The Undo control is explained in further detail in the section on the Zoom and Undo Tools.
|
Warning:
 |
Remember that each level of undo will require the area selects width x height x 4. This means that with 20 levels of undo, and an area select that is 20 pixels x 30 pixels, you would need 48,000 bytes of memory. Some of the operations in WinImages will require an undo buffer that is the entire size of the entire image, which can use up a very large amount of memory in a short time. Select the number of undo's available with consideration given to the amount of memory you can afford to make available to the software. |
|
See Also: The Zoom and Undo Tools
Controlling JPEG Chroma Subsampling
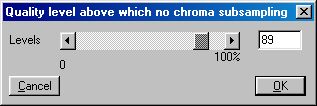
When files are saved in JPEG format, you have the option to set the save "quality" from 0 to 100%. At 100%, it is assumed you want the best possible result. At 0%, you will get such a bad result you'll never use the setting for anything practical.
One of the ways that JPEG reduces the filesize (or in other words, compresses the image data more) is by averaging the color information for every 2x2 square of pixels. It can also consider the color for every pixel (every 1x1 group, so to speak). WinImages allows you to set the quality level theshold at and below which the chroma is only saved for every four pixels, instead of every pixel.
The default point is 90% and above, you get chroma saved for every pixel, and 89% and below, you get chroma saved only for every group of four pixels (2 horizontally, and 2 vertically.)
This control allows you to change the default behaviour so that the switch occurs at any level of quality you prefer.
The original image is at the top. To the left, you see the results of saving at 90% quality with the chroma threshold at 89% (so that the chroma is saved for every pixel). To the right, you see the results of saving at 90% quality with the chroma threshold set at 90% so that the chroma is only saved for each 2x2 group of pixels. These are significant enlargements of the image (you can see individual pixels easily); these effects are most visible in the fine detail of an image. You can see here that the colors of the bikini top are much better defined when chroma is saved for each pixel. The file size is always larger when chroma is saved for each pixel; that's the price you pay for the extra detail.
|
Modal Zoom
This option allows you to select how the zoom control will function. If this option is not selected (default) the zoom will behave as follows:
- Once the Zoom icon has been selected, place the Zoom pointer over the view to be zoomed.
- Press and hold the left mouse button to select the zoom area. The zoom region rectangle is sized with the left mouse button, and is repositioned using both mouse buttons. Release both mouse buttons once the zoom rectangle is the desired size and position. This will zoom the area based on the size of the rectangle, and its relative position. A zoom will always occur with the center of the zoom being the center of the rectangle.
- Once an image is zoomed it can be zoomed any number of levels, down to 1 pixel filling the view. This is done by simply following the above procedure as many times as necessary. A simple 2x zoom can be accomplished by just clicking on the view with the zoom pointer. You also have the capability to scroll a zoomed area using the provided scroll bars.
If this control is selected, the zoom tool will behave as follows:
- Press the zoom icon. You should notice that the zoom icon is now pressed in. This means that you are in zoom mode, and no other action will occur in the image views except zooming.
- To zoom in on an image left click the over the area you wish to zoom. To zoom in further left click again. You can continue to zoom in by left clicking, or you may select to zoom out by right clicking.
- After you have finished zooming or de-zooming the image, double click the zoom icon on the tool bar to turn zooming off.
Keep a log file
The log file contains all of the information about a session in WinImages F/x. This information includes files that were loaded and operations that were applied to images. This is a nice way of keeping track of what has happened to a particular image so that it can be reproduced. The log file will be saved in the root directory of the WinImages F/x program. A log file will be replaced if a new session is started.
Show Chronograph
The Show Chronograph option will turn WinImages F/x's Action Chronograph on or off. If the control is selected or on, the chronograph will be displayed. Once displayed the chronograph will list each action (Load Image, Save Image, Apply Operation, etc.) as it occurs, and will also list how long the action took. If this control is not selected or off, no times for operations will be shown or recorded.
Page 41
WinImages F/x, WinImages Morph and all associated documentation
Copyright © 1992-2007 Black Belt Systems
ALL RIGHTS RESERVED Under the Pan-American Conventions
| WinImages F/x Manual Version 7, Revision 5, Level B |
HTML Documentation Management System © 1992-2007 Black Belt Systems