Page 24
Alpha Channels and Transparency
Within WinImages F/x, images consist either of RGB (red, green and blue) information, or RGB and an alpha channel.
An alpha channel provides specific transparency information for each individual pixel in an image. Or, if you prefer to look at it the other way 'round, an alpha channel provides opacity information.
When the value in the alpha channel for a particular pixel is zero, that means that the pixel is 100% transparent, or 0% opaque. When the value is 255, the pixel is 100% opaque, and 0% transparent. These values correspond to brightness information: When considering image brightness, 0 is black and 255 is 100% color or greyscale. WinImages takes advantage of that correspondence in a number of ways; some are explained in the next section, below.
When alpha channel pixels are set to values from 1 to 254, the image's transparency and opacity varies linearly with the value, just as you might expect.
These simple ideas give rise to the capability to have any degree of transparency you wish, in any portion of an image.
Transparency in Layered Images
Layers give rise to some interesting complications and enhancements to the basic idea of transparency, because each layer of a layered image always has it's own alpha (transparency) channel. Since layers are "stacked" over one another, when a higher layer is transparent, or partially transparent, the layers beneath that layer show instead of, or mixed with, the image data from the upper layer. A typical use of this is to composite text over an image, as shown here:
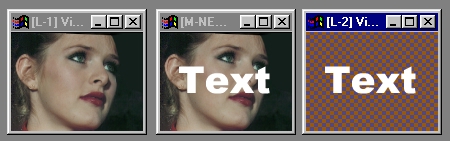
In this layered image, the base layer is at left, and a layer containing text masked off by its alpha channel is at the right. In the master view, at the center, you can see how the alpha masking of the text allows it to cleanly overlay the base layer.
|
You can also manipulate the transparency channel values at any point in a layered image by utilizing one of the masking modes, such as Grey Mask mode. This particular mode uses the greyscale (luminence) values in the layer to replace the transparency of the layer composite below it. Black means full transparency, and white is full opacity. If you make the Grey Mask layer a local layer, then only the transparency of the layer immediately below the Grey Mask layer will be affected, which is often useful. Also, all of the masking layer modes offer these benefits, and provide many variations on how transparency information in derived and subsequently applied.
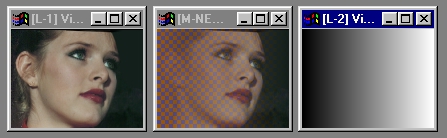
In this layered image, the base layer is at left, and the Grey Mask layer is at the right. In the master view, at the center, you can see the transparency of the base layer precisely following the Grey Mask layer.
|
Transparency in Area Selection Masking
When you apply an operator using a tool from the area selection toolbox, you are essentially creating a temporary alpha channel, through which the effect will be applied. Normally, the area within the selection is 100% on, and the effect will be 100% applied there. The region outside the selection is 0% on (or 100% off, looking at it the other way) and no effect is applied there as a result.
If you have antialiasing turned on, then the edges of the area selection will be slightly transparent, depending on the angle of the edge and the particular shape of the area selection border at that location. If antialiasing is off, then the selection is strictly fully transparent and fully opaque.
You are not limited to this behaviour, however. You can also create and use area selection masks that are not all "on and off."
One way to do this is to use the transparency controls in the area menu to set up automatic edge-sensitive blending options. These are put into effect when you make your area selection. More details about automatic transparency area selection controls may be found here.
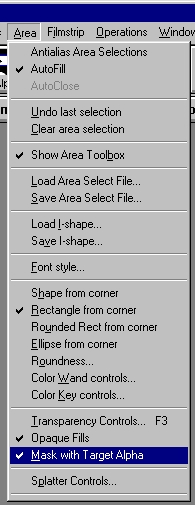
Another way is to use the alpha channel mask that is part of the image as an integral part of the area selection process; that is done by selecting the Mask with Target Alpha option in the Area Menu. In that case, the effect will be applied only where, and to the degree specified by, the alpha channel in the image.
Page 24
WinImages F/x, WinImages Morph and all associated documentation
Copyright © 1992-2007 Black Belt Systems
ALL RIGHTS RESERVED Under the Pan-American Conventions
| WinImages F/x Manual Version 7, Revision 5, Level B |
HTML Documentation Management System © 1992-2007 Black Belt Systems