Page 18
Area Selection
The key to making changes to any image or image layer is to specify you want those changes to be applied. So in many ways, the strength of any image effects or image editing package is limited (or enhanced!) by it's area selection tools.
Modes
WinImages F/x offers two distinct area selection modes.
Immediate Action mode
The immediate mode is very simple in concept: When you create an area selection, as soon as the selection is complete, the change or effect is applied to the action image immediately. This sounds simple - in fact, it sounds so simple that it doesn't sound very powerful, but that's not so. WinImages F/x has a number of tricks you can use to make this very powerful, very accurate, and still simple and fast. The key rests in the use of the right mouse button during area selection, and the boolean modifiers, which we will discuss a little further on.
Select, then Operate mode
This mode works more like Photoshop ®, in that you create the selection step by step, editing and changing it using the various area tools, and then when the area is exactly as you wish, you left-click on the operation you want to perform, and it then is applied to the area selection you made.
Tools
WinImages F/x's area selection tools are extremely powerful and offer a very wide range of control. The following section discusses them very generally; they are discussed in detail
here.
Stroking and Regional Tools
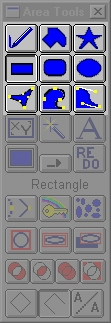 Some tools can be used both to select entire regions, or areas, and also to create paths that brush-strokes can follow. Examples of this are the ellipse and the freehand tool. Looking at the area toolbox, the top nine tools are the ones that can both stroke and fill.
Regional-Only tools
These are the tools that can only create filled areas:
Text (Font)
WinImages F/x handles text as one or more area selections: If you memorize anything about WinImages F/x, it should be this! There is no more often misunderstood tool in WinImages F/x than the text tool.
The idea is this: If you want to create text as almost every other program in the world does it, you select the color fill operator, then the text tool, and bingo, you've got it done. It works just as you'd expect it to. And, it only works as you'd expect it to if you use the color fill tool!
But! If you'd instead prefer to turn the surface of the image into a kaleidoscope underneath the word "FOO", then select the kaleidoscope operator, the text tool, and type in "FOO". It's just that easy. In fact, any effect in the program may be executed in the shape of the area selection - and that capability is so powerful, you could spend weeks experimenting with nothing else.
You can learn more about the text tool here.
Feathering
If you right-click on the A/A button in the area toolbox, a dialog opens that allows you to set the feathering for the area selection. Feathering is a measure of how soft the edge of the area selection will be. This function is also available from the area menu.
Color Keying
WinImages F/x's color keying also creates an area, or areas, but does not create a path. You can key using RGB or HSV methods. You can also key using any of the area tools along with the special color key modifier; more on that below.
Boolean Tool Modifiers
There are a number of "boolean" tool modifiers you can use. These do things like invert the area selection, or mix the current selection with the one made previously. You'll find these at the bottom of the area toolbox. They're easy to spot, because they are all in the second row from the bottom of the toolbox.
Selection Aspect Ratio Control
Often, you'll want to control the shape of the area selection so that it conforms in a general sense to the shape of the image, or to a perfect square or circle. These tools prvide those capabilities, and also allow you to constrain the shape of the area selection to that of the source image, which can be very useful when compositing images.
Splattering
Splattering is a neat modifier that allows you to throw many ellipses or rectangles at an image or layer in one step. Splatter runs inside the area selection you make using any tool.
Undo and De-Undo
WinImages F/x has an enormously powerful undo and de-undo system that can track every change made to every loaded image or layer, and remove that change, or replace it later.
Number of Levels: 0 to infinity
You can choose how many records are kept at one time, from none to as many as your memory will hold. As far as WinImages F/x is concerned, there is no limit - but you will eventually run out of memory if you set the control to infinite. At least, with today's PC's you will. Who knows about the future?
Setting and Using the History
Use the Number of Undo Levels in the Settings menu to control the history. To use it, just click the thumbs-up and thumbs-down tools at the upper right of the main window.
What is kept in the History
WinImages F/x keeps the RGBA data (of course) that actually comprises the image itself. But it also records aspect ratio changes, names and much more when needed. It can even restore an image after a resize operation!
Color Keying Mechanisms
One of the most often needed facets of an image editing program is the ability to color key. Accordingly, we have gone to great lengths to provide some uniquely powerful keying mechanisms. If you're familiar with image editing, you probably already know about the most common two types (RGB and HSV) and the most common way to apply them: the "magic wand." You'll find those in WinImages F/x, of course, but that's just the beginning! You can key destructively or non-destructively, and we've got some amazing keying modes to augment the RGB and HSV methods as well.
Wand Tool
The magic wand allows you to click on an area, and based on the method and tolerance you set (using the right mouse button on the wand tool), the wand will make an area selection for you, in which any effect you like may be applied.
Modifier-Based
This is where it gets interesting. The color key modifier (shown as a gold key over a rainbow in the area tool box) can make area selection become a color key. And there are a number of powerful keying methods available. RGB and HSV, of course, but also our unique and powerful color space keying methods work here. The color space key can actually measure, remember, and use every color in the keying sample area - even if there are millions of them! You can learn more about color space keying here. Plus, there are specialized keying modes that work with heightfields - you can key on height and steepness, two key concepts that will allow you to manipulate heightfield data in a very intuitive and effective manner.
Layer-based
Finally, you can color-key in a non-destructive manner by using image layers. You set the layer to the keying color or colors, and then choose the appropriate layer keying mode. These modes are discussed here.
Page 18
WinImages F/x, WinImages Morph and all associated documentation
Copyright © 1992-2007 Black Belt Systems
ALL RIGHTS RESERVED Under the Pan-American Conventions
| WinImages F/x Manual Version 7, Revision 5, Level B |
HTML Documentation Management System © 1992-2007 Black Belt Systems