Page 185
Quick Nav Bar
<<   Previous Contents
Selection
Op Index
Parent User Notes
Index
Glossary
Next   >>


A simple example for WinImages F/x's Ray Trace operator

Any part of your script not bound in angle brackets will be completely disregarded by the Ray Trace operator, and can function as comments within your script. Also, only those angle-bracketed lines that begin with valid commands will be processed by the Ray Trace operator. This example will contain comments to explain elements of the script. This script, as shown here, is 100% functional. The complete contents of this box can be copied, pasted and used as a "SceneScript."

Click on any command to link to its entry in the "language reference."

<trait "matte">
Trait functions to create "presets", all the information is stored and can (and will in this example) be applied later to simplify matters.
    <ambient .1>
    <diffuse .7>
    <brilliance 1>
    <specular 0>
    <roughness 0>
    <transparency 0>
    <reflectivity 0>
</trait>
We're done describing the trait here.

    <normalize>
Normalize isn't totally necessary in this example, but it is useful in returning to defaults. If you use normalize consistently, you needn't to keep track of if and when you changed certain settings.

Matte ball:
    <position 0 0 0> <radius 3>
     Place the object at the center of the ray tracer's universe, its radius will be 3 units.
    <apply "matte">
    Invoke the trait defined above, the settings defined in the trait become the settings for the object.
    <color 1 0 0>
    Set the color to Red (100% red, 0% green, 0% blue)
<object sphere "My Sphere">
The object we've been configuring is a sphere, it's name is "My Sphere"
    <normalize>
<object bound>
Bounding is a more advanced concept we'll approach later, for now it neither adds to nor detracts from the functionality of this script, it is a statement that affects the speed of the ray tracer.

Light:
    <position 50 50 -75>
    The light will be far up, left, and back.
    <color 1 1 1>
    The light will be colored white
<object light "light_1">
The object is a light source named "light_1".

The next two statements are critical. They control how the viewing frustrum is oriented by defining where the viewpoint is in the ray tracer's universe and a specific location towards which the camera is oriented.

<viewlocation 0 0 14>
The camera is sitting at the point (0,0,14).
<viewtarget 0 0 0>
The camera is "looking at" the origin (0,0,0).


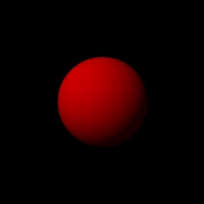
This is the end product of the script.

Keep in mind that this script could have called upon libraries of traits instead of defining "matte" in the script with the following commands:

<libpath "yourpath">
<lib "yourfile.w3d">

Then you can <apply "matte"> and the object will have the same surface properties. For example, here at Black Belt Systems we would include these libraries in the following manner:

<libpath "c:\w3\">
<lib "textures.w3d">

Once applied, any trait contained in textures.w3d would be available for use.

Note that the camera is not an "object" in the scene, it is a vector defined by where it is and where it is "looking." The camera will not alter any part of the scene in any way, it is merely defining the very tip of the viewing frustrum. The camera is usually thought of as a "pinhole camera."

Moving on...


Quick Nav Bar
<<   Previous Contents
Selection
Op Index
Parent User Notes
Index
Glossary
Next   >>
Page 185

WinImages F/x, WinImages Morph and all associated documentation
Copyright © 1992-2007 Black Belt Systems ALL RIGHTS RESERVED Under the Pan-American Conventions

WinImages F/x Manual Version 7, Revision 5, Level B

HTML Documentation Management System © 1992-2007 Black Belt Systems