
| Quick Nav Bar | ||||||||
|---|---|---|---|---|---|---|---|---|
| << Previous | Contents |
Selection |
Op Index |
Parent | User Notes |
Index |
Glossary |
Next >> |
| a=EXTEND(EDGETYPE, REPLACE, EDGEDIR[0-3], distance, red, green, blue) |
| Items in CAPS are 0/1 switches or switches with more options than 0/1. |
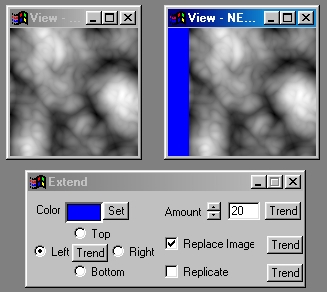
The Extend operation allows you to increase or extend the physical size of the image in any one direction. You have control over the direction of the pixel extension, the number of pixels, and how the new pixels will appear. You also have the option of replacing the previous image, or creating a new image with the specified pixel extension. This operation can be especially useful for creating banner or caption areas in the image for text.
|
Trends
You will notice that all of the controls have a Trend button next to them. The trend button allows you to set that variable over a set of frames. Each frame of the animation can be thought of as a slice of time. The trends allow you to alter some, all, or none of the variables for a particular time slice. You will notice that the trend graphs have equidistantly spaced vertical lines. Each of these lines represents a frame in the animation. The number of frames can be altered using the Sequence controls... in the Timeline pull down menu. Animation lengths of 100 - 999 frames will be represented with a vertical bar being 10 frames, and animation length greater than 1000 frames will have a vertical bar for every 100 frames. Click here to view more information on Trends.
Color Set
The Color Set button will access the Color Selection dialog, and allow you to select a color for the extended area from the palette. This color will only be used if the Replicate option is not selected. If you would like to view more information on the Color Selection dialog, Press Here.
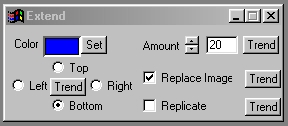
Direction
These four buttons allow you to select the direction in which the pixel extension will be applied. For example if you select the Bottom button (default), the operation will add the specified number of pixels to the bottom portion of the image.
Amount
This control allows you to set the total number of pixels that the image is to be extended in any one direction. The control ranges from a setting of 1 to a setting of 9999 additional pixels. It is important to remember that extending an image by a large number of pixels will greatly increase the amount of memory necessary for the image.
Replace Image
This option allows you to select if the extended image will replace the existing image in memory, or create a new image leaving the original un-altered.
Replicate
This control determines the nature of the extension. If it is selected, the image will be extend with the colors of the pixels on the outside edge of the image in the specified direction. If it is not selected, the pixel extension will be the color specified with the Set Color button.
| Quick Nav Bar | ||||||||
|---|---|---|---|---|---|---|---|---|
| << Previous | Contents |
Selection |
Op Index |
Parent | User Notes |
Index |
Glossary |
Next >> |
| WinImages F/x Manual Version 7, Revision 5, Level B |