
| Quick Nav Bar | ||||||||
|---|---|---|---|---|---|---|---|---|
| << Previous | Contents |
Selection |
Op Index |
Parent | User Notes |
Index |
Glossary |
Next >> |
| This command has been superceded by the SPixel and SPercent operators. |
| Items in CAPS are 0/1 switches or switches with more options than 0/1. |
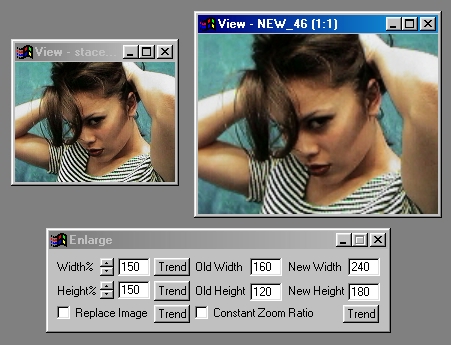
The Enlarge operation allows you to increase the size of a selected view by a percentage or pixel amount.
For instance, this means that you can stretch a 320 x 240 image to a 640 x 480 image. It is important to remember that enlarging an image will not increase the image information. Enlarging will only increase the image size, and interpolate the original information.
Enlarging may be useful in making extremely low resolution images more pleasing to the eye. This operation can also be used to make a group of files the same resolution via the Timeline.
Trends
You will notice that all of the controls have a Trend button next to them. The trend button allows you to set that variable over a set of frames. Each frame of the animation can be thought of as a slice of time. The trends allow you to alter some, all, or none of the variables for a particular time slice. You will notice that the trend graphs have equidistantly spaced vertical lines. Each of these lines represents a frame in the animation. The number of frames can be altered using the Sequence controls... in the Timeline pull down menu. Animation lengths of 100 - 999 frames will be represented with a vertical bar being 10 frames, and animation length greater than 1000 frames will have a vertical bar for every 100 frames. Click here to view more information on Trends.
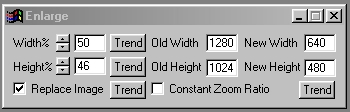
Width %
This control allows you to control the percentage increase for the width of the image. The percentage increase can range from 100% to 1000%, with 100% being no change in the resolution. All changes made to the percentage value will be reflected in the New Width control. The width can be altered by moving the slide gadget, entering the appropriate percentage value, or entering the desired pixel value in the New Width control. Altering the value in the Old Width control will have no effect.
Height %
This control allows you to control the percentage increase for the height of the image. The percentage increase can range from 100% to 1000%, with 100% being no change in the resolution. All changes made to the percentage value will be reflected in the New Height control. The width can be altered by moving the slide gadget, entering the appropriate percentage value, or entering the desired pixel value in the New Height control. Altering the value in the Old Height control will have no effect.
|
Replace Image
This option, when selected, will automatically replace the image that was being enlarged. This allows you to reduce the amount of memory needed by the program by opening fewer image views. If you select to Undo the enlarge operation, WinImages F/x will be able to retrieve the unaltered image. If this option is not selected, then WinImages F/x will create a new image view with the enlarged image. This setting is saved when you exit the program, and reloaded when you start again.
Constant Zoom
The Constant Zoom option allows you to select how a stream of images is enlarged. If this option is selected, then the images will all be enlarged by a constant enlargement factor. This value is the percentage value on the Width and Height controls. If this option is not selected, then all images will be enlarged to the same dimensions.
| Quick Nav Bar | ||||||||
|---|---|---|---|---|---|---|---|---|
| << Previous | Contents |
Selection |
Op Index |
Parent | User Notes |
Index |
Glossary |
Next >> |
| WinImages F/x Manual Version 7, Revision 5, Level B |