Page 30
WinImages F/x Tools
There are five groups of tools in WinImages F/x. Each of these groups contributes to the process of image processing and creating animations. These groups are: The Area Selection Toolbox, The Operations Toolbar, The Pull Down Menus, The Timeline and The Filmstrip. Each of these tools are described below, and each section contains a jump to that tool's detailed documentation.
WinImages F/x offers users a choice of how they would like the program to operate. There are two separate Working Methods available in the software: Immediate Painting and Draw First.
The Immediate Painting method is the original operating style that was designed for WinImages F/x. This method works like many paint programs in that you create the area selection, and the current operation is immediately applied to the specified region. This method allows the user to quickly select areas, and have the current operation applied immediately after the area is completed.
The Draw First method allows you to make an area selection, alter it to your specifications, and then apply an operation to the area. This working method is similar to the way that many image processing programs work. Area selection is carried out in exactly the same way, but the current operation is not applied until the operation icon is clicked on. This allows you to alter and refine an area selection until it meets your specific needs. The area selection will appear as a dashed marquee outline of the selected region. You can then apply the default (or last) operation settings to the region by left clicking on the operation icon. The operation settings can be changed by right clicking on the operation icon, and then altering the operation parameters. After you have made the desired changes to the operation's dialog you opened with the right click, you can then actually apply the effect to the currently selected area by left clicking on the operation icon.
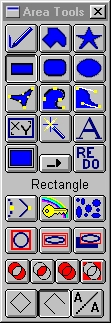
The Area Selection Tool Box
The Area Selection Tool Box contains all of the area selection modes and modifiers for the program. An area select defines where the operation will occur. WinImages F/x area selection method can work in one of two ways:
Area Selection Method 1 - Immediate Painting Method
- Select an area selection method (i.e., ellipse)
- Select the effect (this can also be done prior to selecting the area selection
tool)
- Alter the settings of the operation to your own specifications
- Select the area on the image you are working with
- You may now select to repeat the operation with the same area selection tool or a new tool based on your specific needs.
These same basic guidelines can be used for animation sequences as well. For an animation sequence you would:
- Select an operation by clicking and holding the left mouse button while over its icon. Drag this icon to the Timeline, and place it in the desired frame location. This technique of selecting and placing the operation in the Timeline is known as Drag and Drop.
- Select the area selection for the operation using the same Drag and Drop method.
- Choose the appropriate settings for this operation (see the Timeline section for more information).
- Select Generate to create the animation.
Area Selection Method 2 - Draw First Method
- Select an area selection method (i.e., ellipse)
- Select the area on the image that you are working with (the area will appear as a dashed marquee outlining the selected region)
- Alter the area selection to best suit your needs (this is explained in greater detail below)
- Select the operation that you would like to apply to the current area selection by left clicking the mouse on the operation's icon. WinImages F/x will automatically apply the operation with the current settings in the specified region. These settings can be changed prior to application by right clicking on the operation icon, and then altering the settings to the desired values. After the proper values have been set, you may left click on the icon to carry out the operation in the selected region.
- A new operation can then be applied to the same region by left clicking on the operation icon, or a new area can be selected by following the steps above for each new area. WinImages F/x uses a modal area selection method. This means that every area selection tool is maintained as the current mode until changed by the user. Each of the area selection modes is used in the same relative manner. For most of the area selection methods the left mouse button sizes the area and the left and right mouse buttons pressed together move the area select. Both Working Methods (Immediate Painting and Draw First) can have area selections add or subtracted from the original area. Areas may be added by pressing the SHIFT key while making the area selection, and areas may be subtracted from the area selection by pressing the CTRL key while making the area selection. This allows you the greatest amount of freedom in creating complex area selections in an image. Descriptions of all of the area selection modes and how they are used can be found in the Tool Box documentation.
See Also: The Area Selection Tool Box
The Operations Toolbar
The Operation Groups contain the individual effects in the program.
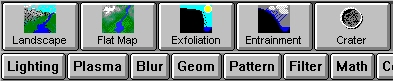
The operation groups are: Lighting, Plasma, Blur, Geometric, Pattern, Filter, Mathematical, Collage, Landscape, Standard Adjustments, Alpha, Morph, Art, Photo, Video and Attributes.
Each of these groups contains a number of effects that are interrelated. Each individual operation can be selected using the Operations Tool Bar or the Operations Pull Down Menu.


"Chapter Bar" Operations Groups
The Operations Tool Bar consists of two areas, the "Chapter Bar" and the "Verse Bar". The Chapter Bar, shown above, allows you to quickly access groups or chapters of operations. The Verse Bar, a portion of which is shown below, contains the buttons for the actual operations. Pressing one of the Chapter Bar buttons will move that group of icons to the far left of the Verse Bar.

"Verse Bar", showing some of the Render operations
Together, the Chapter Bar and the Verse bar are referred to as the "Tool Bar". In the documentation, when we refer to using the tool bar, we mean for you to use the Chapter Bar to move the group of operations to be used into view on the Verse Bar, and then select the specific operation under discussion using the appropriate button on the Verse Bar.
The "Tool Bar"
Individual operations can also be selected using the Operations Pull Down Menu. An operation can be selected from the menu by clicking on the name of its group, and then on the specific operation.
|
Note:

|
This is only true for the Immediate Painting working method. If you are using the Draw First method, then the operation can be selected and altered by right clicking on the icon. The operation will be applied to the selected region when the operation icon is clicked on with the left mouse button. |
|
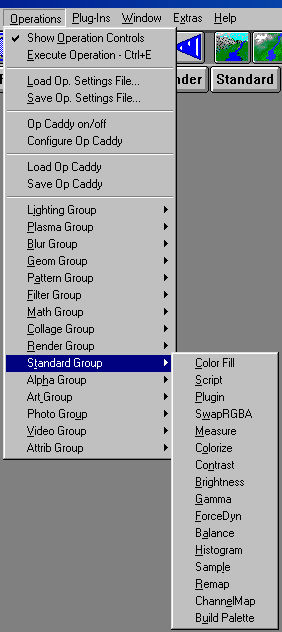 Selecting the operations this way will also move the group's icons to the far left of the Tool Bar.
You will notice that almost all of the controls in the operation dialogs have a Trend button next to them. The trend button allows you to set that variable over a sequence of frames. Each frame of the animation can be thought of as a slice of time. The trends allow you to alter some, all, or none of the variables of an operation for a particular time slice. You will notice that the trend graphs have equidistantly spaced vertical lines. Each of these lines represents a frame in the animation. The number of frames can be altered using the Sequence controls… option in the Timeline pull down menu. Animation lengths of 100 - 999 frames will be represented with a vertical bar being 10 frames, and animation length greater than 1000 frames will have a vertical bar for every 100 frames.
Click Here to view further information on trends.
See Also: WinImages F/x Operations
Pull Down Menus
The Pull Down Menus contain the settings and controls for file manipulation, animation creation, the filmstrip, display, and many others. The pull down menus are: File, Generate, Display, Settings, Area, Filmstrip, Operations, View, and Help. Clicking on any of the menu titles will bring up the underlying menu. Each of these menus, and their contents, are discussed in detail in the sections on pull down menus.
The Timeline
The Timeline allows you to create animation sequences by simply dragging and dropping the effects and area selections into the Timeline. For example, if you wanted to do a Relief effect in a rectangular region, you would simply click on the Relief icon and drag it to the Timeline. You can then place the area selection using the same method of clicking on the rectangle icon, and then placing it in the Timeline. Using the Timeline is as simple as that, but it doesn't end there. The Timeline can also do some very powerful operations like changing the amount of an effect over time (this process is also known as interpolation or tweening), processing multiple action and
source images, multiple effects in the same animation, area selection interpolation, and much more.
See Also: The Timeline
The Filmstrip
The Filmstrip controls allow you to view animations that you have created or to keep a visual record of the changes made to an image. The filmstrip controls are very similar to the controls of a VCR. The filmstrip will load WinImages F/x and Morph FLM files and FLI/FLC animations. The filmstrip is not intended to be an editing tool for filmstrips.
See Also: The FilmStrip
Page 30
WinImages F/x, WinImages Morph and all associated documentation
Copyright © 1992-2007 Black Belt Systems
ALL RIGHTS RESERVED Under the Pan-American Conventions
| WinImages F/x Manual Version 7, Revision 5, Level B |
HTML Documentation Management System © 1992-2007 Black Belt Systems