| Quick Nav Bar | ||||||||
|---|---|---|---|---|---|---|---|---|
| << Previous | Contents |
Selection |
Op Index |
Parent | User Notes |
Index |
Glossary |
Next >> |
|
a=LOADPLUG("path_and_file.wis") a=PUPALNC(Number_of_Colors_In_Palette) a=PUSTRING(which_string,"string") a=PURADIO(which_radio,selection[0-7]) (selection may be [0-3] or [0-1]) a=PUCHECK(which_check[0-7],VALUE) a=PUFLOAT(which_float[0-7],value) a=PUINTEGER(which_int[0-7],value) a=PUPROFILE(which_profile[0-11],index[0-200],value[0-255]) a=PURGBA(which_rgba[0-3],r,g,b,a) a=PUPALRGB(which_palette[0-1],index[0-1023],r,g,b) a=PUCMD(command_number[0-29]) (immediately executes command button) Once the plug-in function is set up, call this to run it: a=PLUGIN() |
| Items in CAPS are 0/1 switches or switches with more options than 0/1. |
![]()
Trending Plug-in Effects
All plug-in values and settings are trendable in the timeline. To trend most of the various user interface elements of the dialog, you would drag the operator into the timeline with the settings as you wish; for integer values, you also have the option of using the "T" button next to the value to set a trend graph.
Area Selections
Plug-ins can (but might not) obey the area selections you make. Whether they do depends on what the plug-in does - this is an area where you would look to the documentation for the plug-in itself.
Color Transfer Modes
Plug-ins can (but might not) obey the color transfer modes you select. Whether they do depends on what the plug-in does - this is an area where you would look to the documentation for the plug-in itself.
|
Saving Plug-in Settings
As long as the appropriate preferences setting remains checked, WinImages F/x will save all parameters for each plug-in you use as you change them. The plug-in settings are saved in a file called "WINFXpu.INI" in the "Windows" directory, wherever that is in your system. If you find that you are having trouble with one or more sets of plug-in values, it is possible that deleting this file may help. Be very careful to ensure that the file you delete is the one named here - you can cause major havoc by deleting the wrong file in the windows directory!!!
Loading Plug-Ins
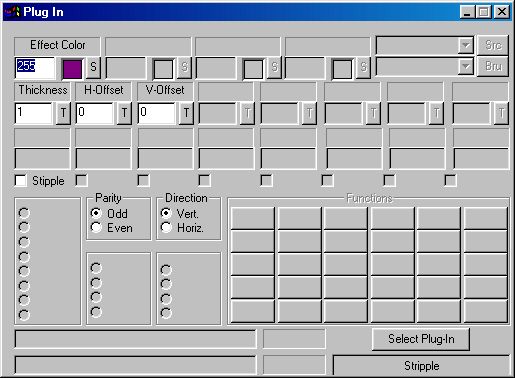
To load a new plug-in, simply press the "Select Plug-in" button, navigate to the location where the plug-in is installed (we suggest c:data\plugins\) and select the desired plug-in module. Plug-ins should be files that end with the extension .wip
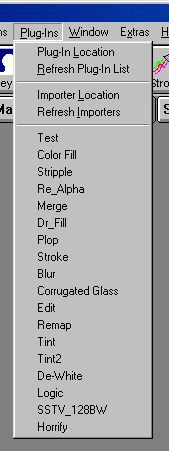 In addition, you can load plug-ins using the menu system; WinImages F/x searches out all installed plug-ins and places them on the menu for you to directly select. Note that selecting one from the menu does not pick the plug-in operator if another operator is selected, but it does load the specified plug-in so when you do change to the plug-in operator, the correct plug-in will already be loaded and ready to go.
Source and Brush Images
If a plug-in uses a source or brush image in its operation, the source and brush drop-down lists may be made available for you to select images.
Scripting
Any plug-in may be called using the scripting language. Please see the section on scripting for more details. The syntax of the plug-in specific commands are shown at the top of this page.
In general, you can set up as few as one dialog item, or all of them, or anywhere in between. You can load any plug-in from a script, and you can execute them as well.
Undo and Plug-ins
Undo entries will carry the name of the plug-in so you can tell what was going on.
Want to develop WinImages F/x plug-ins yourself?
|
| Quick Nav Bar | ||||||||
|---|---|---|---|---|---|---|---|---|
| << Previous | Contents |
Selection |
Op Index |
Parent | User Notes |
Index |
Glossary |
Next >> |
| WinImages F/x Manual Version 7, Revision 5, Level B |