| Quick Nav Bar | ||||||||
|---|---|---|---|---|---|---|---|---|
| << Previous | Contents |
Selection |
Op Index |
Parent | User Notes |
Index |
Glossary |
Next >> |
|
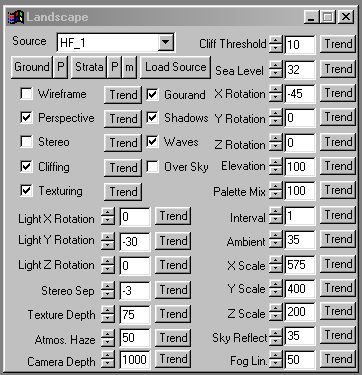
a=LANDCLIFF(CLIFFING, steepness) a=LANDHAZE(hazelevel, fog linearity) a=LANDROT(x, y, z, lx, ly, lz) a=LANDSCALE(x, y, z) a=LANDTEXT(separation, tex depth, cam depth, TEXTURING, STEREO, PERSPECTIVE, ambient) a=LANDWATER(WAVES, level, skyreflect) a=LANDSCAPE(elevation, palette mix, grid scale, WIREFRAME) You can call these functions in any order, except that you must call LANDSCAPE() last. |
| Items in CAPS are 0/1 switches or switches with more options than 0/1. |
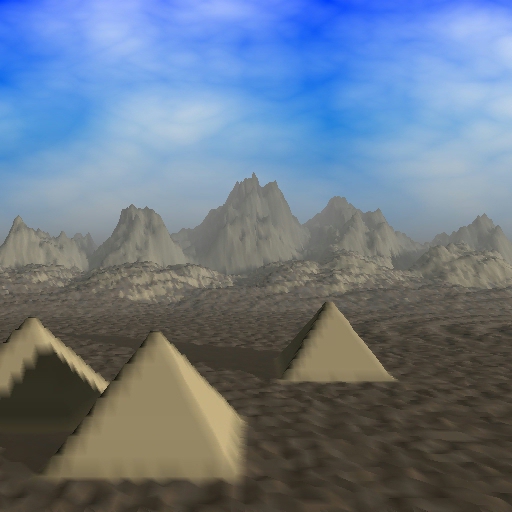
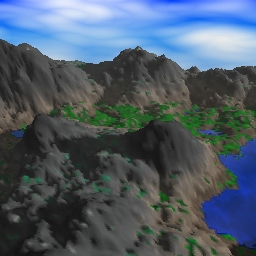
![]()
|
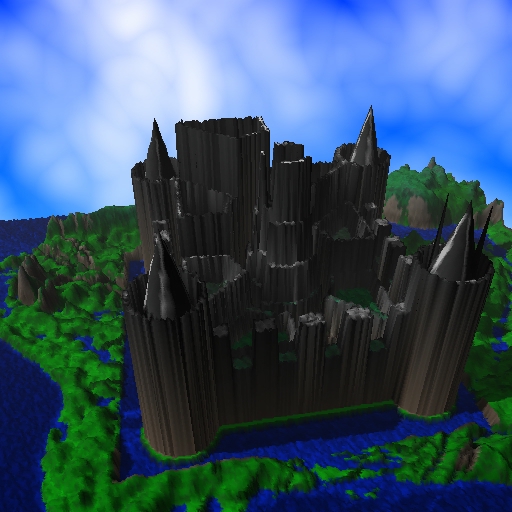
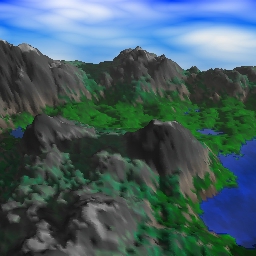 Resulting Generation
|
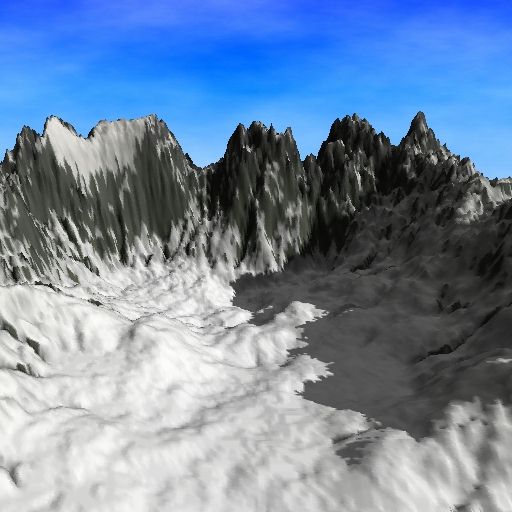
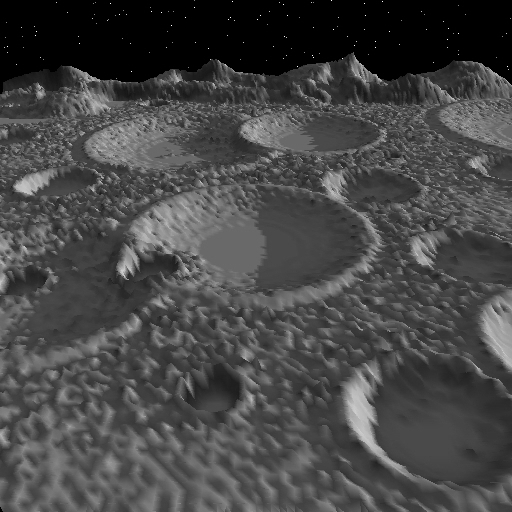
The landscape operation is intended to provide a means for you to evaluate the heightfields that F/x can generate using its Texture Engine. You may then use those heightfields with powerful ray tracing applications such as POV-Ray to generate realistic landscapes.
WinImages F/x can supply many of the typical landscape application features at very high speed, allowing not only still evaluation, but also animated output.
While it was not our intent to provide a "final-quality" landscape application, it wasn't long after we created the basic tool that WinImages beta testers began producing some fairly stunning "final" output using nothing else but WinImages. So with the caveat that its not what we meant to do, we will go so far as to say you can do quite a bit of high quality work with it anyway. As an evaluation tool, it is quite powerful.
|
Trends
You will notice that most of the controls have a Trend button next to them. The trend button allows you to set that variable over a set of frames. Each frame of the animation can be thought of as a slice of time. The trends allow you to alter some, all, or none of the variables for a particular time slice. You will notice that the trend graphs have equidistantly spaced vertical lines. Each of these lines represents a frame in the animation. The number of frames can be altered using the Sequence controls... in the Timeline pull down menu. Animation lengths of 100 - 999 frames will be represented with a vertical bar being 10 frames, and animation length greater than 1000 frames will have a vertical bar for every 100 frames. Click here to view more information on Trends.
Ground
This control allows you to load a 256-color palette to use as an altitude cued color scheme for the output landscape where the land is less steep than specified via the steepness control if steep is checked. If steep is not checked, then the entire surface is colored using this palette. The P control immediately to the right of the Ground control allows you to actively edit this palette at any time. If you would like to learn more about the palette controls, Click Here.
When this operator is dragged into the timeline, palettes will automatically trend to the next palette, if another exists in the timeline.
Strata
This control allows you to load a 256-color palette to use as an altitude cued color scheme for the output landscape in areas where the land is steeper than provided for in the steepness control if steep is checked. The P control immediately to the right of the Strata control allows you to actively edit this palette at any time. If you would like to learn more about the palette controls, Click Here.
When this operator is dragged into the timeline, palettes will automatically trend to the next palette, if another exists in the timeline.
m
The m control presets a convenient "moonscape" palette.
Load Source and Source Drop-Down List
These allow to to choose the image that will be used as the input heightfield for the landscape generator.
Wireframe
When checked, this causes the generator to produce a wireframe output image rather than a solid one.
Perspective
Although the generator does not use a camera model per se, it can put the resulting images through a perspective transformation. When checked, perspective is on.
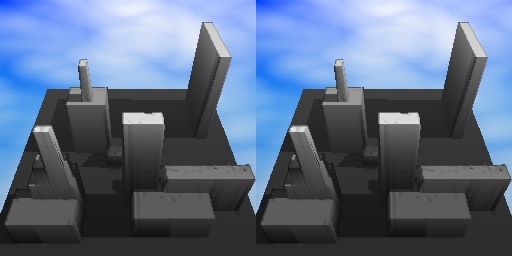
Stereo
This control, when checked, causes the generator to produce pairs of frames with a viewing angle separated by the amount specified in the Stereo Sep control.
Stereo Sep
This control provides the separation for the second viewpoint required for a stereo image pair. It defaults to -3 degrees, which is a good general setting. If you decide to change this for any reason, make sure you test the output carefully as extreme separations cause eye fatigue, and insufficient separations cause the perception of depth of field to be lost.
Cliffing
When this is checked, the strata palette is applied to the landscape instead of the Ground palette when the altitude difference between heightfield pixels meets of exceeds the value set by the steepness control.
Texturing
This control, when checked, perturbs the surface of the land portion of the output to a degree specified in the texture depth control.
Texture Depth
This control specifies the depth the ground is disturbed by the landscape generator when texturing is checked.
Light X, Y and Z Rotation
This is the amount the light source (sun) is rotated around the viewpoint from the "high noon" position.
Atmos. Haze
This control sets the amount of atmospheric haze. Zero means no haze, and 100 is maximum haze. This interacts with the Fog Lin. control.
Camera Depth
This is the distance from the rendered landscape that the camera is located at. Keep this fairly far away in order to reduce the number of undesirable artifacts in the resulting image.
Gourand
This controls smooth shading. When the is checked, the output landscape's polygons will be smoothed nicely. When it is not, the output polygons will show clearly when close to the viewpoint.
Shadows
When this is checked, the generator applies a fast shadow generation technique to add depth and drama to the output image. Other items that affect this are the Ambient level and the light rotations.
Waves
When this is checked, the generator will perturb the surface of the water, assuming there is any. Affected by the Sea Level control.
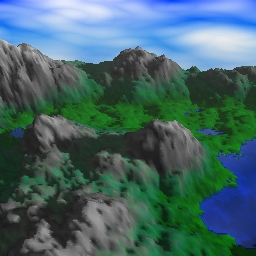
Over Sky
This control is intended to be used when you are placing the output landscape in a still frame that has a sky texture already in it. It will take the texture and compress it so that it goes from the top of the frame to the landscape horizon. If Sky Reflect is non-zero, it will also use the texture as a "reflection" in the water, if there is any water. Finally, it will apply the haze settings to the sky texture so that the haze appears to include the sky at the horizon.
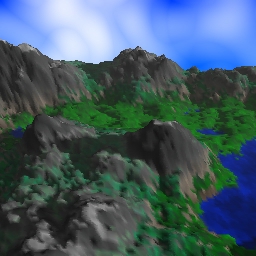 Over Sky set to Off Note sky uncompressed, water basic color |
 Over Sky set to On Sky compressed, water reflecting sky |
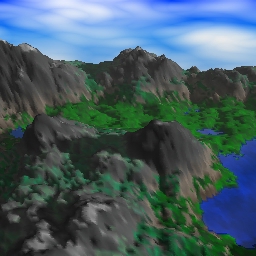
Cliff Threshold
This sets the threshold where coloration for the landscape switches from the ground palette to the strata palette. The higher the setting, the less ground will be marked as exposed rock. The concept of "cliffing" is that when the ground is steep, it is less and less easy for vegetation, snow or any "ground cover" to cling to the landscape, and so the idea is that depending on the altitude we choose a position in the strata palette colored appropriately for exposed ground without cover at that particular altitude. The example strata palette goes from browns (dirt) through a series of greys and blacks (rock) as it goes "higher". If Cliffing is not checked, this has no effect.
 Cliff threshold set to high value |
 Cliff threshold set to low value |
Sea Level
Heightmaps are interpreted as altitudes from 0 to 255 based on the luma of the pixels in the heightmap. The Sea Level setting will cause the heightmap to be "flooded" at the height it is set to and below. If you want to disable flooding, set this to -1.
Sea Level set to 32 |
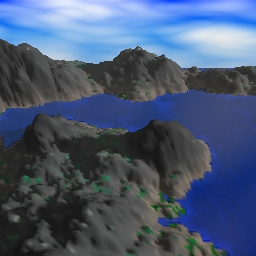 Sea Level set to 64 |
X, Y and Z Rotation
These controls allow you to rotate the landscape. 0 degrees in all of them will result in a map that you are directly overhead.
Elevation
This control sets the height that the pixels in the heightmap are interpreted to mean. At 100, the correspondence is 1:1, and at 50, the output heightfield will be 1/2 the usual height. Interacts with the Z Scale setting.
Palette Mix
This control sets the amount of coloration that comes from the heightmap's original colors. At 0, the heightmap supplies the colors. At 100, the palettes supply the colors. At 75, 25% of the color comes from the heightfield and 75% from the palettes.
Interval
This control allows you to subsample the heightfield. This results in a less well-defined output, however it can speed up the process a great deal. You can also trend it for a lovely "increasing resolution" effect in the output heightfield, though the range of useful settings is fairly small. Works well with wireframe also.
|
 Interval = 1 |
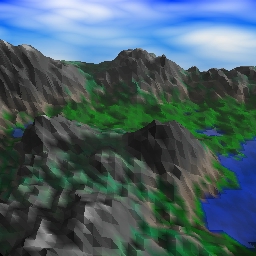 Interval = 2 |
Ambient
This sets the ambient light level. When this is zero, areas that are in shadow will be black. Ambient light comes from directly overhead, that is, the "noon" position.
X, Y and Z scale
These set the actual output size of the landscape as it relates to the target, or action image. You can create some interesting effects by exaggerating axis unequally.
Sky Reflect
This control sets the amount of sky that reflects in the water, if there is water and if the Over Sky control is checked. Requires that you generate into an action image that contains a sky texture.
Fog Lin. (Fog Linearity)
This controls how the atmospheric haze is applied. When it is at 0, a strong logarithmic component us used to force most of the haze to appear in the distance.
|
| Quick Nav Bar | ||||||||
|---|---|---|---|---|---|---|---|---|
| << Previous | Contents |
Selection |
Op Index |
Parent | User Notes |
Index |
Glossary |
Next >> |
| WinImages F/x Manual Version 7, Revision 5, Level B |