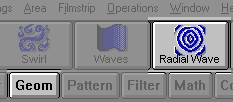
Geom Group and Radial Wave Button

Radial Wave Dialog
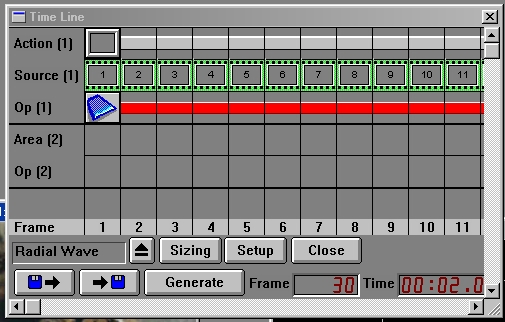
...once the dialog is open we will want to set the parameters to the following values: Distortion:25, Frequency:5, Half Waves:1, Radius:0, Phase:0, Shading:20. Once you have adjusted the parameters to these settings, you will be ready to place the first radial wave icon in the Timeline. (Before you try to place the radial wave operation into the Timeline, make sure that frame 20 is are visible.) Now, use the drag and drop method to place an icon in frame 20. If frame 30 is also visible, place another radial wave icon there. If it is not visible, scoll the Timeline until it is visible, and then place the 2nd radial wave icon in frame 30.
If we were to generate the radial wave with these settings, there would be no movement in the wave. This is due to the fact that frame 20 and frame 30 have the exact same settings at this point, because you have made no changes. We want to create a rippling splash effect, so we will have to change the settings for frame 30. This can be done by double clicking on the radial wave operation icon in frame 30. Now, select the Set Current Settings option...
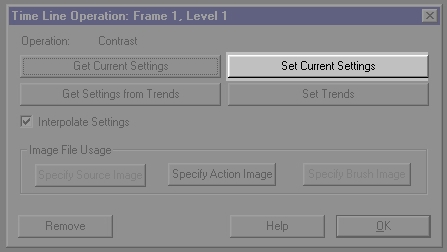
Timeline Operations Dialog showing Set Current Settings button
...this will access the Radial Wave dialog so that you can alter or view the key frame's current settings. You will want to change the following parameters: Half Waves:15, and Phase:360...
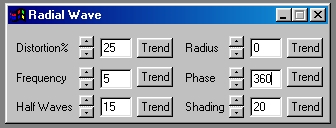
Radial Wave Dialog showing settings for 2nd Operator
...these changes will result in a wave which starts at the center of the area selection, and then radiates outward over the remaining ten frames. Click on the Timeline dialog to confirm these settings. WinImages F/x will automatically place the new values into the key frame.
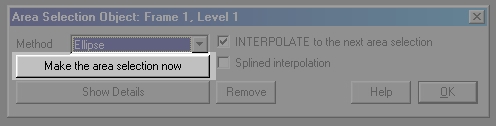
Timeline Area Selection Dialog
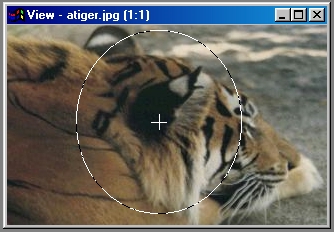
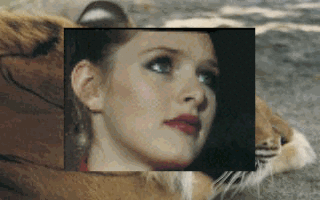
...now, select the Make the area selection now option.
This allows you to make an area selection on the current action image. If the current action image is not the tiger.jpg image, select the area on the image that is presented. WinImages F/x will automatically size the area selection to the action image in the sequence. The elliptical area should be near the center of the image, and should be fairly small, as shown here...

atiger.jpg showing small ellipse area selection in progress
...after you have made the area selection, WinImages F/x will automatically update the area selection key frame with the appropriate settings.
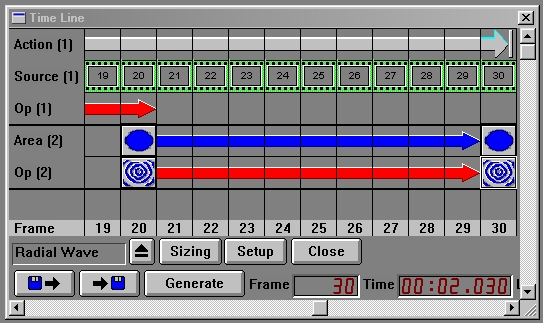
Now, use the same steps to create the area selection for frame 30. This area selection should also be near the center, but it should be almost the size of the images height, as shown here...
atiger.jpg showing large ellipse area selection in progress
...this will cause the wave to spread out over the image as the sequence progresses.
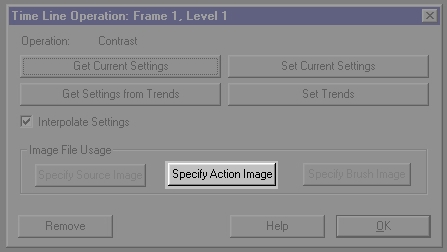
Timeline Operations Dialog showing Specify Action Image button
This allows you to specify the action image or images for an animation sequence. The "action" image is the image that WinImages performs an action upon; in this case, that will be to place the spinning animation and the radial waves. When you press the button, this dialog appears:

Timeline Specify Action Image Dialog showing Specify Image File button
The second image option is the Specify Action Image button. Selecting this button will access the Timeline Action Image dialog. This dialog allows you to specify action image sequences or image files. Select the Specify Image File button located at the top of the dialog. This will open a file requester for selecting the image or image sequence to load. Select the atiger.jpg image from the...
...directory, and then select the Ok button to confirm the file selection. WinImages F/x will place the image file into the Timeline with a continuance arrow from frame 1 to frame 30.
Now, we will specify the source image animation file. This file can be specified in the same manner described above. Open the Timeline Operation dialog by double clicking on the perspective operation icon in frame one of the Timeline. Now, select the Specify Source Image button. Select the ladyfrog.flc animation file from the...
...directory using the Specify Image File option. Select the Ok button to confirm the settings and exit the dialog.
|
You should see a set of icons that look like filmstrip frames in the source image area of the Timeline. These icons are numbered from 1 to 30, and represent each of the frames in the animation. For this example, we will only need the source image for frames 1 to 20. We will decrease the action zone of the source image animation file by clicking on the arrowhead in frame 30 that is attached to the perspective icon (on the second line) with the left mouse button. This will "grab" the end of the effect application, and allows us to alter its size. Drag the arrowhead back to frame 20, and then release the left mouse button. This will speed up the overall generation time.
Before you proceed, check to see if your final Timeline looks like these pictures:
Start of example Timeline
Last ten frames of example Timeline