
| Quick Nav Bar | ||||||||
|---|---|---|---|---|---|---|---|---|
| << Previous | Contents |
Selection |
Op Index |
Parent | User Notes |
Index |
Glossary |
Next >> |
| a=SAT(percentage) |
| Items in CAPS are 0/1 switches or switches with more options than 0/1. |
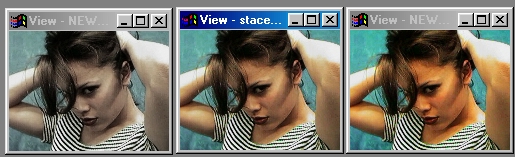
The saturation control will adjust the intensity or deepness of the colors in the image. This operation uses a single control to alter the amount of saturation that is added (positive values) or subtracted (negative values) from each pixel in the area selection. It is important to remember that the Hue of the image will not be altered, only the saturation values. If you would like to alter both the hue and saturation values for the image, please use the Colorize operation.
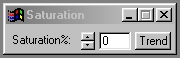
Trends
Some of the controls have a Trend button next to them. These trend buttons allow you to set variables over a series of frames. Each frame of any animation may be thought of as a slice of time. The trends allow you to alter some, all, or none of the variables for a particular time slice. Trend graphs have equidistantly spaced vertical lines. For animations under 100 frames in length, each of these lines represents a frame in the animation. The number of frames in any one sequence can be altered using the Sequence controls item from the Timeline pull down menu. Animation lengths of 100 - 999 frames will be represented with a vertical bar being 10 frames, and animation length greater than 1000 frames will have a vertical bar for every 100 frames. Click here to view more information on Trends.
Saturation
The saturation control ranges from -100 to 100, and allows you to alter the specific saturation values for all of the pixels in the area selection. Saturation can be defined as the intensity or deepness of a color (hue). If you increase the saturation value, the colors will become more vivid or intense. If you decrease this value the colors will lose their deepness and will eventually become gray. Due to this fact, you will want to avoid using large negative values with this operation. If you do not, the entire image inside the area selection will appear as a gray value.
| Quick Nav Bar | ||||||||
|---|---|---|---|---|---|---|---|---|
| << Previous | Contents |
Selection |
Op Index |
Parent | User Notes |
Index |
Glossary |
Next >> |
| WinImages F/x Manual Version 7, Revision 5, Level B |