Page 33
Image File Manager
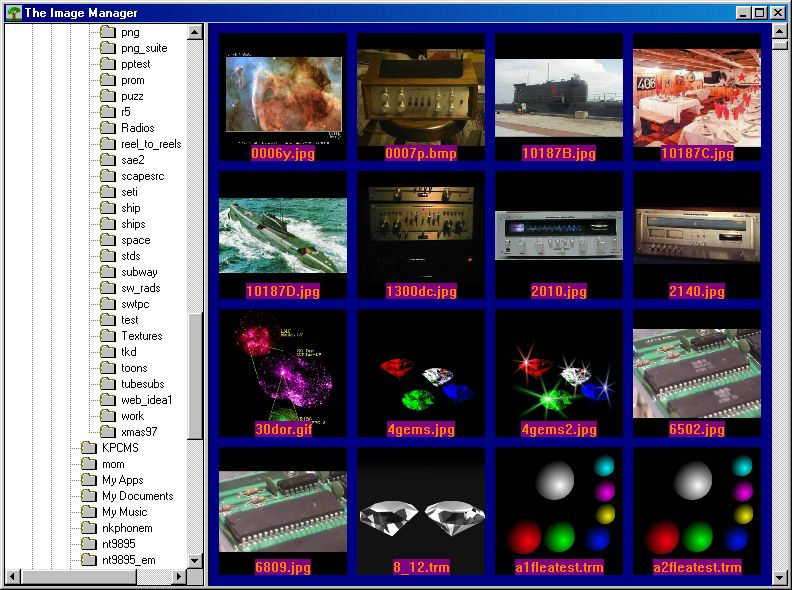
Image Manager
General Information
The Image File Manager is a powerful tool that you can use to manage all the types of image files that WinImages F/x can read.
You can use it to load files visually, sort and select sets of image files, specify thumbnailing sizes and much more.
The Image File Manager can even be used to load the timeline with selected files for brush, target and source image streams, which is a very powerful and flexible way to specify timeline image streams. For one thing, this gets around the approximately 120 file limitation imposed by Microsoft's "Explorer" file dialogs - you can load any number of files using the file manager. Another important feature is the ability to sort the images by date, name or size, forwards or backwards, and then be able to select a set of images using a set of wildcards that can select precisely the files you want, which are then fed to the timeline.
The image file manager even addresses your security needs by being able to utterly destroy, in place on the storage device, image files such that they are absolutely unrecoverable even by high-technology methods.
Global Preferences
There are two global preferences settings (see the file/preferences menu command to set these) that affect the manager. One controls whether the manager remembers its path from one use of WinImages F/x to the next, and the other controls whether the manager opens automatically when WinImages F/x is started.
Operation
Context Menus
If you right-click in the IFM's thumbnailing pane, one of three context menus will come up, depending on if there are thumbnails for the directory or not, or if there are thumbnails that are selected.
These context menus provide the primary interface for you to work with the IFM.

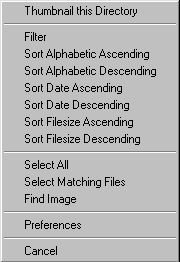
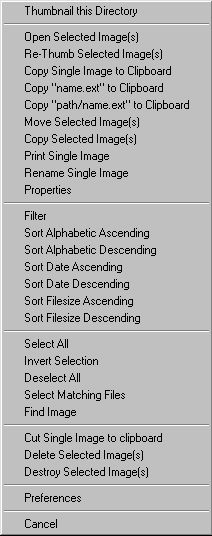
Image Manager context menus
Overview
These context menus provide capabilities based upon thumbnails being available or not, and whether you are clicking directly upon one of the thumbnails when there are thumbnails available, as follows:
No Thumbnails Available
In this case, you have the options of setting the image file manager's preferences, generating thumbnails for any images in the directory, or canceling the menu. You can also change the Filter state; the filter capabiliity allows you to select which files you wish to view.
Thumbnails available, but none are selected
This adds choices to sort the images in various ways, select them using a pattern or all at once, or find a particular image file by name. Sorting is very useful, because when the IFM is used to select images for the timeline, sorting them can place them into an order that makes it easy (or at least, easier) to select the set you want. In fact, if you combine sorting with the filter capability, you'll find that you can easily limit the display to just the files you want.
Tip: |
It is more than worth your time to become familiar with the pattern matching system that is used in the find, select and filter tools. The syntax is the same for all three. The dialogs contain a "quick guide" that really does cover the most important ideas. Refer to that as you work with selections. Practice a few - it'll really pay off!
|
|
Thumbnails available, one or more selected
This adds choices for all selected images to load into WinImages F/x, re-thumb, delete, destroy, copy or move to a new location.
For individual images only (for the most recently selected image if more than one is selected), you are offered the ability to copy the image itself, the text full path of the image, or just the image's name to the clipboard, cut the image itself to the clipboard, view the properties of the image, rename the image or print the image.
You also get choices to deselect all, or invert the selection.
Keystrokes
The following keystrokes are available:
| Keystroke | Operation |
|---|
| Page Up | Previous page of thumbnails |
| Page Down | Next page of thumbnails |
| Home | First page of thumbnails |
| End | Last page of thumbnails |
| Up Arrow | Up one row of thumbnails |
| Down Arrow | Down one row of thumbnails |
| F or Ctrl-F | Find a particular image file |
| S or Ctrl-S | Select image file(s) |
| F3 | Find Next matching file |
| SHIFT-F3 | Find Previous matching file |
| Enter | Load selected file(s) |
| Del | Delete selected file(s) |
|
Tip: |
Keep in mind that these keystrokes only work when the thumbnail pane has the focus. If the keystrokes do nothing, click on an image file. If there is a selection set you're trying to preserve, press control and click the same image twice; that will leave the selection set the same and move the focus to the window as you require. |
|
Individual Features
Image Selection with the Mouse
You can single-right-click anywhere in the thumbnail pane. This will bring up a context menu of actions you may immediately perform.
You can single-left-click on any image. This will select that image, and de-select any other images that were previously selected.
You can double-left-click on any image. This will immediately load the image into WinImages F/x and deselect any other images that were previously selected.
You can single-left-click on an image, then press and hold SHIFT and then single-left-click on another image, and all of the images between them as well as the two you clicked on will be selected. This is a range selection.
You can press and hold control and then single-left-click on images; clicking on unselected images will select them, and clicking on selected images will de-select them.
Image Selection using a String Pattern
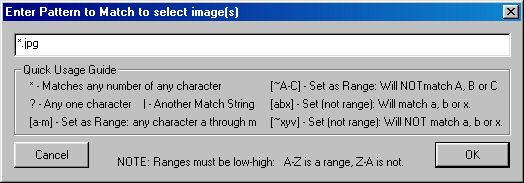
Pattern Entry Dialog
You may select images using a powerful method of filename wildcards and pattern control.
This tool is available using either the context menus, or by pressing the S key.
The dialog provides a guide to the selection syntax.
If files are selected, the display will move to the first image in the selection. Images that are not displayed may also be selected.
Select All Image Files
This selects all image files in the current directory.
Invert Selection
Any files that are selected become unselected, while any files that were unselected become selected.
Deselect All Image Files
This deselects all image files in the current directory.
Filtering the images to be displayed
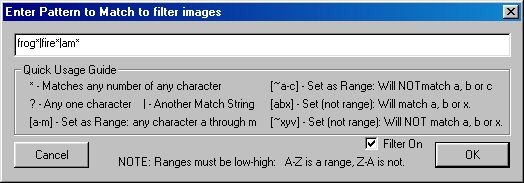
Image Filter Dialog
By selecting Filter from the context menu, you can choose what files are to be displayed in the thumbnail pane. This can make it easier to select files, and it can also help you deal with very large directories or folders. Filtering is "sticky", that is, WinImages F/x saves the settings between uses.
You can select a reasonable range of files very easily. Imagine you have files 100.jpg through 900.jpg, plus a whole bunch of other randomly named files in the same directory, and you wish to work with the files 250.jpg through 299.jpg
This pattern would limit the display to just that:
2[5-9][0-9].jpg
...that pattern says that the first character must be a 2, the second character may be any character between, and including, 5 and 9, and that the third character may be any number, and finally, that the file must end with a .jpg extension. This will match any file name between 250.jpg and 299.jpg perfectly, and it won't match anything else at all.
There are cases that are not perfectly matchable with a simple filter string; for instance, you can't select filenames from 250 through 350 this way, but you can select them using multiple terms separated with vertical bars, like this:
2[5-9][0-9].jpg|3[0-4][0-9].jpg|350.jpg
|
Note:

|
Note that if you don't have the Filter checkmark selected, filtering will not occur, even if you've entered a filter string and selected OK to exit the dialog. |
|
Finding Images
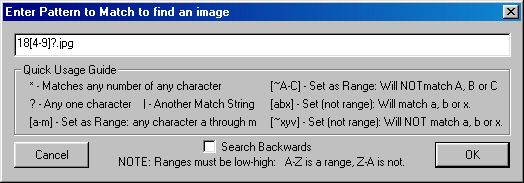
Image Find Dialog
This tool uses the same pattern system as does the selection tool. But instead of selecting all the images, this will cause the thumbnail window to move to the first image that matches the pattern. Press F3 to move to the next matching image, or SHIFT-F3 to move to the previous matching image.
If you select Search Backwards in the Find dialog, next will move backwards and previous will move forwards.
The currently found image will automatically be selected.
Using the IFM with the Timeline
If the IFM is open and one or more image files are selected, then when you press any image file selection button in a timeline dialog, the images will be loaded automatically from the selected set in the IFM.
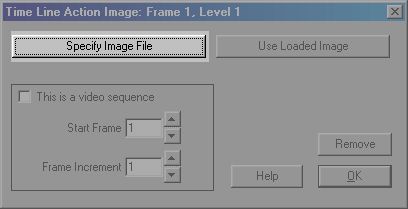
Load Images to Timeline Example
This takes a little getting used to, because you have to set up the selection before you press the "Specify Image File" button in the timeline dialogs, however, the advantages are significant:
- The IFM can select any number of images - Explorer dialogs are limited to about 140.
- The IFM, by judicious use of the "sorting", "range selection","control-click add/remove selection" and "select by pattern" features, allows you to control both the load order and the images that load precisely - you can't do that in an Explorer dialog, either.
Copy Single Image File to Clipboard
This allows the image to imediately be pasted in any application that understands the standard Windows clipboard using images.
Cut Single Image File to Clipboard
This allows the image to imediately be pasted in any application that understands the standard Windows clipboard using images. It also removes the image, just like delete.
Copy Image File Name to Clipboard
This allows the image filename (without the path) to imediately be pasted in any application that understands the standard Windows clipboard using text.
Print Single Image File
This prints the most recently selected image if there is more than one selected, otherwise it prints the selected image.
Copy Full Image File Name and Path to Clipboard
This allows the image filename, including the path, to imediately be pasted in any application that understands the standard Windows clipboard using text.
Sort All Image Files in Alphabetic Order
You can sort ascending or descending. Sorting mode is "sticky", which means that WinImages F/x will remember what mode you last used even between uses.
Sort All Image Files in Date Order
You can sort ascending or descending. Sorting mode is "sticky", which means that WinImages F/x will remember what mode you last used even between uses.
Sort All Image Files in Size order
You can sort ascending or descending. Sorting mode is "sticky", which means that WinImages F/x will remember what mode you last used even between uses.
Delete selected Image File(s)
This permanently deletes the selected files. It doesn't ask if it's ok, so be careful!
Destroy selected Image File(s)
Under various circumstances, it becomes important - even critical - that image data is maintained at a very high level of security. For on-site security, access to image data is relatively easily controlled if it is practical to put the proper limiting procedures in place. However, even under those circumstances, equipment that has been used to hold such data may manage to inadvertantly fall into the hands of those with access to data recovery methods; these range from simple low-technology "un-delete" programs to scanning the magnetic media itself for patterns with specialized electronic equipment. Such events can occur if a machine is sent out for repair, if it is taken by force, given away to a charity, and even if it is recovered from the trash in supposedly non-working condition.
The Destroy function permanently and utterly eliminates the selected files and their thumbnails. Destroy operates exactly like delete from the user's perspective, except that it takes longer. What WinImages F/x does is actually locates the file's position on the writable storage medium (typically a disk drive) and rewrites the data stored in that position with complex iterations of random nonsense. Only then is the file actually "deleted."
A file that has been treated in this manner is unrecoverable by any method. Use this feature to prevent knowledge of the image data you handle from becoming available to hostile entities via low- or high-technology recovery methods.
Caveat: If you move files or re-save them using any method (Windows explorer, for instance) you may leave behind a "ghost" file that can be recovered. In order to ensure the security of a file, it should never be edited or moved once placed on disk. Otherwise, the entire disk will have to be hard-formatted and re-written in order to remove the data.
Move selected Image File(s)
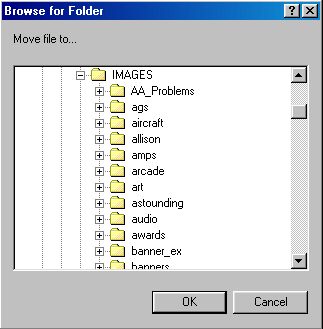
Browse for Move Directory Dialog
This allows you to move all selected files to the chosen directory. The thumbnails are moved as well. If there isn't a standard WinImages F/x thumbnail directory, one is created to contain the thumbnails.
Rename Single Image File
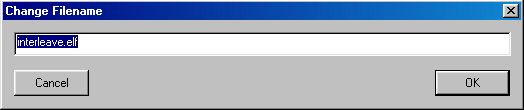
Rename Image Dialog
Both the image and the thumbnail are renamed.
Thumbnail the current Directory
This tells WinImages F/x to search the current directory for image files, and if found and they are readable, to create thumbnails for them using the current preferences settings.
|
Tip: |
Some image files may be damaged in such a way that WinImages F/x cannot recover from attempting to read them, and the result will be that WinImages F/x will crash.
However, before WinImages F/x tries to read any image, it places a marker on disk that lets it know not to try reading that image again - because if that marker is there before it tries to read an image, it knows that the last time it tried, it never woke back up - so it's smart enough to leave it alone the second time around!
We, like you, would prefer that WinImages F/x never crashed - but it is frankly impossible to account for all the ways image files can be damaged.
|
|
Re-Thumbnail selected Image File(s)
There will be times when you wish to increase or decrease the resolution of the thumbnails for certain images. This will re-generate the thumbnails of all selected images using the current preferences settings.
Auto Row/Column Size Selection
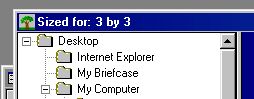
IFM Row/Column autosizing indication
When you re-size the IFM, it stops drawing thumbnails for performance reasons. During the resize operation (while you're dragging the window to a new size), it will display the number of rows and columns of thumbnails in the current thumbnail display size that will fit in the thumbnail window. Use this to easily size the window to just the number of rows and columns you desire.
Preferences
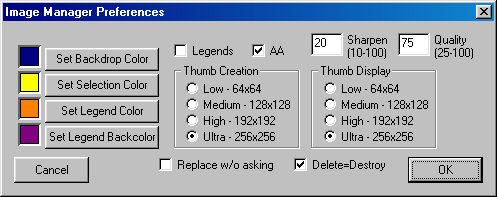
Image Preferences Dialog
You may configure all items in the preferences dialog to your taste, and WinImages F/x will save them between uses.
For the highest quality thumbnails, we suggest that you use the Ultra size setting (or a custom setting higer then 256) for both create and display, select the AA setting, and set Sharpen to 20. A Quality setting of 75 is generally sufficient, though a higher setting will resolve colored details better. The quality setting interacts with the Settings menu, JPEG Chroma Subsampling command setting. For better thumbnails, make sure the Quality setting here is higher than the JPEG Chroma Subsampling setting.
|
Tip: |
Even if you generally prefer to set Thumb Display to see a smaller thumbnail, it's probably worth it to have the Manager create the thumbnails in Ultra or higher, using the custom size option. That way, if you decide you want to have a better look, the detail will be there. If you create in lower settings (e.g. Medium) then there is no way to recover the lost detail.
|
|
The Delete=Destroy setting forces the Image Manager to completely write over the filesystem storage location where the image was stored with random numbers prior to deleting it, even if you select Delete, rather than Destroy. This safety measure protects you from any known image recovery technique, as long as the image was only copied to your computer's hard drive one time.
Image Properties
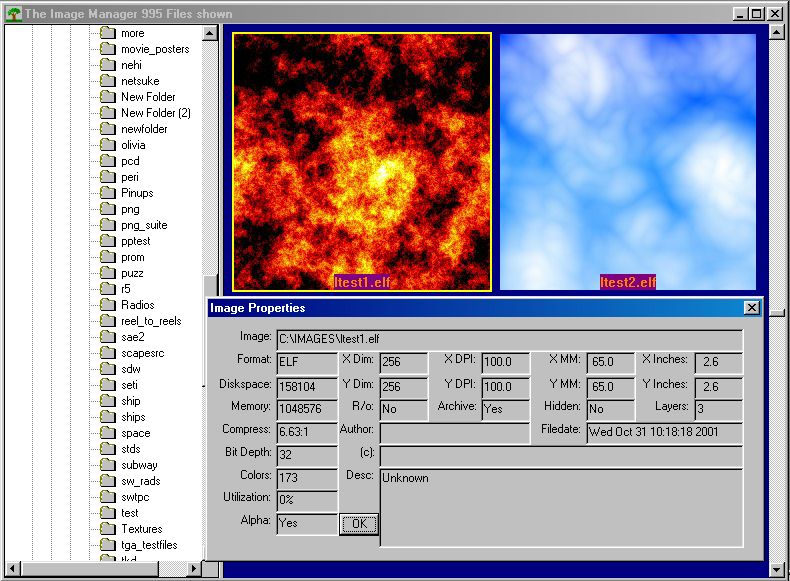
Image Properties Dialog
The following image properties are determined and shown to you:
- name
Self-explanatory.
- date
The date the file was last written to.
- disk space taken
How many bytes the disk file takes up on your storage device.
- memory required
How much memory the image will take when loaded into WinImages F/x.
- compression ratio
This is the ratio of disk space taken the amount of image data actually in the file.
- color count
This tells you how many colors (out of 16 million) the image actually uses.
- color space utilization percentage
This tells you how many of the image's pixels are unique colors. If all the pixels are different colors, the utilization is considered to be 100%. This indicates a very colorful image.
- bit depth
This tells you how many bits deep of data are in the image file. Typical values are 8, 24 and 32.
- format
This tells you the image format, if WinImages F/x can determine it. In the case of plug-in file formats, FX won't know what it is, just that it can load it and thumb nail it.
- layers
How many layers the image file has.
- alpha information
Tell you if the image has transparency information.
- pixel dimensions
How many pixels across and down the image extends.
- DPI
Dots Per Inch (or pixels per inch.)
- size in inches
The number of pixels across and down times the DPI.
- size in MM
The number of pixels across and down times the DPI converted to millimeters.
- read-only
Indicates if the image file is set to a read-only state (this might be the case for images provided on CD-ROM, for example.)
- archived
This indicates if your computer believes this file is archived. View this file status bit with suspicion!
- hidden
If the file is set to not show in normal directory searches.
- author
Information from within the image file denoting who the creator of the file was.
- copyright
Information from within the image file denoting who the copyright holder of the file is.
- description
Information from within the image file that describes the file or issues relating to the file.
Page 33
WinImages F/x, WinImages Morph and all associated documentation
Copyright © 1992-2007 Black Belt Systems
ALL RIGHTS RESERVED Under the Pan-American Conventions
| WinImages F/x Manual Version 7, Revision 5, Level B |
HTML Documentation Management System © 1992-2007 Black Belt Systems