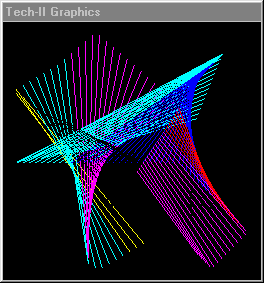
 KINART.CMD Output |
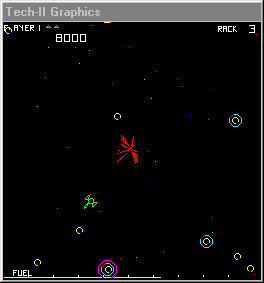 RB.CMD Output |
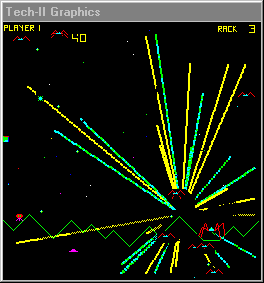 IT.CMD Output |
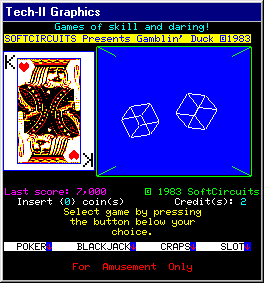 CARDS.CMD Output |
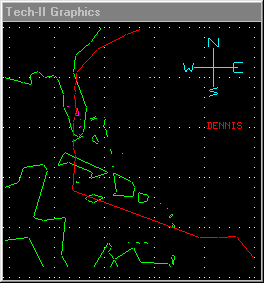 STORM.BAS Output |
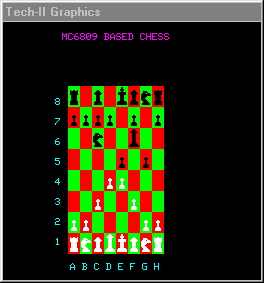 CHESS.CMD Output |
| Document Navigation | ||||
|---|---|---|---|---|
| Table Of Contents | Index | Notes | Previous | Next |
The actual implementation uses two bytes of memory space; is quite flexible and capable, allowing fast line drawing, pixel writing, erase and easily handled "pseudo-sprites"; can write pixels as fast as the CPU can store bytes, and used less than five dollars worth of TTL (not counting the display ram). Looking at the design today, it's still far better than a straight frame buffer, though (of course) it can't compare with dedicated graphics engines. But if I'd had a multi-million transistor design budget, who knows what this might have turned into...
The display appears in its own window. If you do not open the window using the appropriate menu item (Modes/Graphics), it will open automatically when the first graphics command is executed by running 6809 software. I've provided a few graphics programs for you to play with:
|
KINART.CMD Output |
RB.CMD Output |
|
IT.CMD Output |
CARDS.CMD Output |
|
STORM.BAS Output |
CHESS.CMD Output |
If you would like to work with the graphics EM-ware, a fairly complete discussion follows. If you simply prefer to play with the supplied graphics programs, then by all means, read no further.
Note: The emulation of the 6522 VIA is only complete to the degree required for the graphics and interrupt emulations to function.
The graphics hardware has two ports, or addresses, it is accessed through. The first port (at $E030) is the command port. The second port (at $E031) is the data port. The command port accepts four commands, and the data port accepts three data formats, depending on which command has most recently been issued. These are color, pixel addresses, and a vectoid, which is a single pixel with the vector characteristic of displacement.
The data port is a single byte with bits organized as follows:
| Command | b7 | b6 | b5 | b4 | b3 | b2 | b1 | b0 | Format |
|---|---|---|---|---|---|---|---|---|---|
| Clear | n/u | n/u | n/u | n/u | n/u | C2 | C1 | C0 | Color |
| Write Y | b7 | b6 | b5 | b4 | b3 | b2 | b1 | b0 | 8-bit Position |
| Write X | b7 | b6 | b5 | b4 | b3 | b2 | b1 | b0 | 8-bit Position |
| Write Vectoid | Y.D/u | X.L/r | Y | X | n/u | C2 | C1 | C0 | Vectoid |
Pixel colors are defined as follows:
| Color | Bit Organization | ||
|---|---|---|---|
| RGB: | C2 | C1 | C0 |
| Black | 0 | 0 | 0 |
| Blue | 0 | 0 | 1 |
| Green | 0 | 1 | 0 |
| Aqua | 0 | 1 | 1 |
| Red | 1 | 0 | 0 |
| Purple | 1 | 0 | 1 |
| Yellow | 1 | 1 | 0 |
| White | 1 | 1 | 1 |
The command port is a single byte of which two bits are used to select one of four possible commands:
| b7 | b6 | b5 | b4 | b3 | b2 | b1 | b0 |
|---|---|---|---|---|---|---|---|
| n/u | n/u | n/u | n/u | n/u | n/u | K1 | K0 |
Graphics are created using four "Commands" to the graphics hardware:
| Command | Code | Use | ||||
|---|---|---|---|---|---|---|
| Clear | 00000011 | Write the Clear command to the command port. Then write a byte with the desired color choice in C2,C1,C0 to the data port. At the time the data byte is written, the entire display will be cleared to the chosen color. The vector bits are ignored for this command. | ||||
| Write Y | 00000010 | Write the Write Y command to the command port. Then write a byte that is the Y adddress of the desired position on the display. The display position is changed; no pixels are modified. | ||||
| Write X | 00000001 | Write the Write X command to the command port. Then write a byte that is the X address of the desired position on the display. The display position is changed; no pixels are modified. | ||||
| Write Vectoid | 00000000 | Write the Write Vectoid command to the command port. Then write a byte to the data port that contains the vectoid data. When the vectoid data is written, the X and Y positions are modifed according to the settings of the highest order four bits of the vectoid data byte, then the resulting pixel address is set to the color in the C2,C1,C0 bits. The four control bits allow X:Y pixel adjustment in any of the eight vertical, horizontal and diagonal directions. | ||||
| Further Information | Displacement | --b7-- Y.D/u | --b6-- X.L/r | --b5-- Y | --b4-- X | |
| The table at the right describes the exact behaviour of a vectoid write. All displacement occurs prior to the pixel modification. For instance, if the current X:Y address is 128:128 (the center of the display), the command is Write Vectoid, and you write 11110101 to the data port, the pixel address is first changed to 127:129, then the pixel at 127:129 is changed to purple. | Up | 0 | x | 1 | 0 | |
| Up, Right | 0 | 0 | 1 | 1 | ||
| Right | x | 0 | 0 | 1 | ||
| Down, Right | 1 | 0 | 1 | 1 | ||
| Down | 1 | x | 1 | 0 | ||
| Down, Left | 1 | 1 | 1 | 1 | ||
| Left | x | 1 | 0 | 1 | ||
| Left, Up | 0 | 1 | 1 | 1 | ||
| No Motion | x | x | 0 | 0 | ||
Because the command port is mapped to the VIA's B data port, which is at the base address of the VIA ($E030), and the data port is mapped to the VIA's A data port which is at the base address plus one ($E031), you can use any 16-bit store operation to very quickly (one fast instruction) write the command, then the data. A table of 8, 16-bit values can provide you with all of the clear commands, for instance.
Since once a command is written to the command port, it remains set, you can also write multiple vectoids to the data port one after another. Envision writing a stream of bytes from a table somewhere to the data port. As a program task, things just don't get much more trivial.
Now, since each vectoid may contain a displacement, they can modify the X:Y position as they are stored. For instance, if you wanted to write a 4x4 blue square, you would first write the X and Y commands with the X and Y position (of the upper left corner for this table), then the write vector command, then store the contents of the following table to the data port:
 FCB $11  1     Initial X:Y address  -->  C 1 2 3
 FCB $11  2                               B     4
 FCB $11  3                               A     5
 FCB $A1  4                               9 8 7 6
 FCB $A1  5
 FCB $A1  6
 FCB $51  7
 FCB $51  8
 FCB $51  9
 FCB $21  A
 FCB $21  B
 FCB $21  C
You can, of course, use the hardware by writing X, writing Y, then writing a vectoid with no motion - that's three 16-bit stores per pixel and is 6x slower than the hardware's maximum display speed (one 8-bit store per pixel), but it's still mighty quick. It's a lot easier to figure out, too. However, if you want to use the hardware the way I described, following are a set of equates that will make it much easier. To use these equates, just "or" in the color to the direction and store (repeatedly, as many times as you like) to $E031 after writing $00 to $E030, once. The equates to use are EAST, WEST and so on. They are built "from" the preceding equates.
*
* BIT POSITION VALUES
*
B7      EQU    128
B6      EQU    64
B5      EQU    32
B4      EQU    16

*
* VECTOR DIRECTION EQUATES
*
VUXY    EQU    B5+B4       VECTOR UP X & Y
VUYX    EQU    VUXY
VUX     EQU    B4          VECTOR UP X
VUY     EQU    B5          VECTOR UP Y
VDXY    EQU    B7+B6+B5+B4 VECTOR DOWN X & Y
VDYX    EQU    VDXY
VDX     EQU    B6+B4       VECTOR DOWN X
VDY     EQU    B7+B5       VECTOR DOWN Y
VDXUY   EQU    B6+B5+B4    VECTOR DOWN X & UP Y
VUYDX   EQU    VDXUY
VUXDY   EQU    B7+B5+B4    VECTOR DOWN Y & UP X
VDYUX   EQU    VUXDY

*
* THE FOLLOWING PAIRS OF EQUATES ALLOW YOU TO
* CHOOSE ORIENTATION... IN A VIDEO GAME, IT
* IS VERY USEFUL TO SWITCH ORIENTATION QUICKLY.
* FOR INSTANCE, IN A COCKTAIL TABLE GAME, THE
* DISPLAY MUST BE FLIPPED VERTICALLY FOR EACH PLAYER,
* AND A SET OF VALUES CAN BE HARD-CODED FOR THAT,
* OR CHOSEN AT RUN TIME. THE TWO SETS HERE ALLOW
* YOU TO DRIVE THE MONITOR SIDEWAYS OR VERTICALLY.
* NICE AND FLEXIBLE. AS SHOWN HERE, THE ORIENTATION
* IS DECIDED AT ASSEMBLY TIME. BUT YOU COULD EASILY
* MAKE THESE VARIABLES INSTEAD OF EQUATES, AND THEN
* STORE THE CONTENTS OF THE VARIABLES TO THE
* GRAPHICS HARDWARE. YOU COULD HAVE ANY OF FOUR
* ORIENTATIONS (THOUGH ONLY TWO ARE SHOWN HERE) SET
* UNDER PROGRAM CONTROL. WHEN YOU'RE CODING VIDEO
* GAMES FOR THE VARIOUS STYLES OF ARCADE CABINETS,
* THIS IS INVALUABLE.
*
HORIZ   EQU    1

        IF HORIZ=1
*
*HORIZONTAL ORIENTATION
*
WV      EQU    0
WY      EQU    1
WX      EQU    2
WC      EQU    3

EAST    EQU    VUX
WEST    EQU    VDX
SOUTH   EQU    VUY
NORTH   EQU    VDY
NW      EQU    VDXY
SW      EQU    VDXUY
SE      EQU    VUXY
NE      EQU    VUXDY

        ELSE

*
*VERTICAL ORIENTATION
*
WV      EQU    0
WX      EQU    2
WY      EQU    1
WC      EQU    3

EAST    EQU    VUY
WEST    EQU    VDY
SOUTH   EQU    VUX
NORTH   EQU    VDX
NW      EQU    VDXY
SW      EQU    VUXDY
SE      EQU    VUXY
NE      EQU    VDXUY

        ENDIF
| Table Of Contents | Index | Notes | Previous | Next |
| Document Navigation | ||||
|---|---|---|---|---|